
Glass Guides
Glass Skylight Installation Guide: Bringing Natural Light to Indian Homes
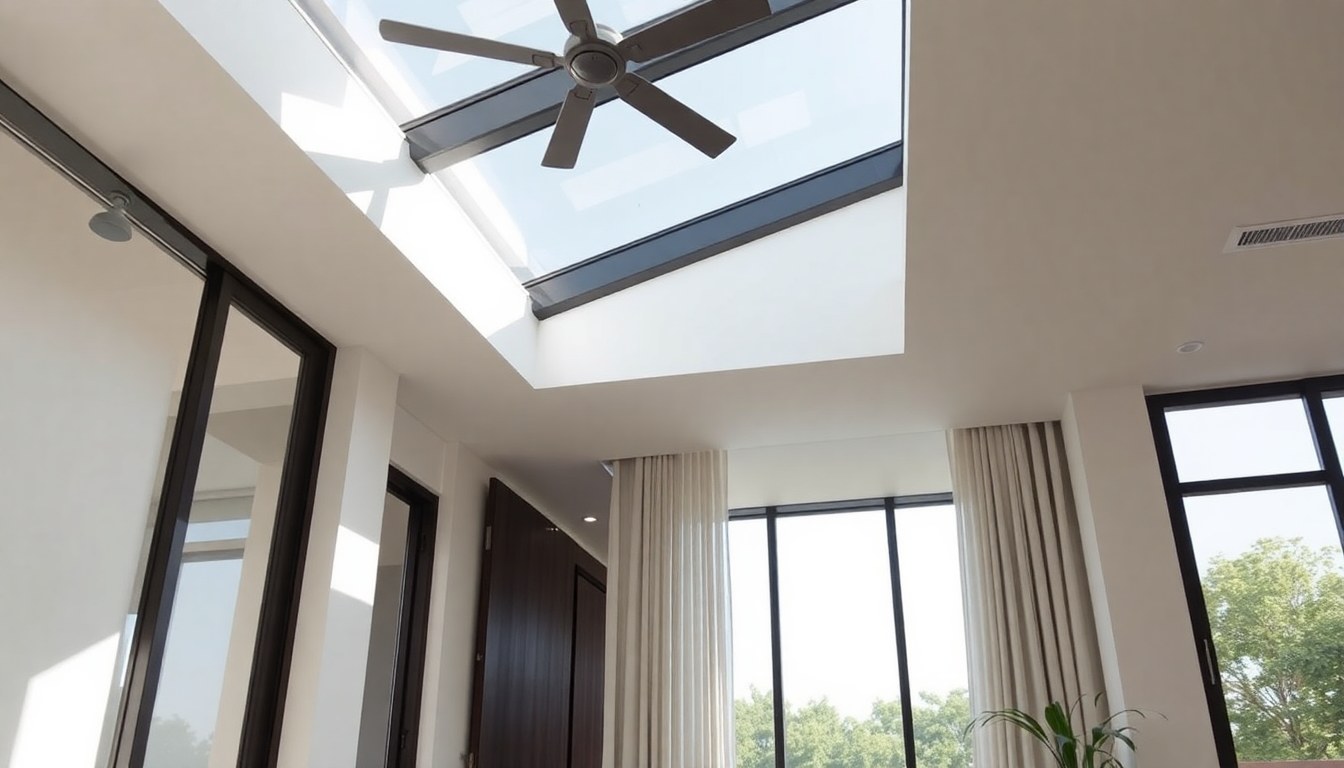
Skylights transform living spaces by flooding rooms with natural daylight, reducing energy consumption, and creating a stronger connection to the outdoors. In India's diverse climate zones—from humid coastal regions to dry plateaus—proper skylight installation requires careful planning around structural integrity, waterproofing, and glass selection. This guide walks you through every step of the process, ensuring your skylight installation enhances your home while protecting it from the elements.
Understanding Skylight Glass Types and Their Performance
The glass you choose for your skylight determines how much light enters, how much heat is transmitted, and how well your home stays insulated. In India's hot climate, selecting the right glass composition is critical to preventing excess solar heat gain while maximizing daylight benefits.
Tempered Glass is the most common choice for skylights because it's four to five times stronger than standard glass and shatters into small, blunt fragments if broken—making it safer for overhead installations. Laminated Glass consists of two glass panes bonded with a plastic interlayer, providing superior sound insulation and UV protection. For Indian homes, laminated tempered glass is often the best option because it resists thermal stress from temperature fluctuations and filters up to 99% of UV rays.
Low-emissivity (Low-E) glass has a microscopic coating that reflects infrared heat while allowing visible light through. This is particularly valuable in India's warm climates, as it reduces cooling costs during summer months. Tinted or reflective glass can further reduce heat gain but may darken interior spaces more than homeowners prefer.
- Tempered glass: Best for safety and durability in residential skylights
- Laminated glass: Provides UV and sound protection; ideal for rainy regions
- Low-E coated glass: Reduces solar heat gain; recommended for hot climates
- Double-glazed units: Improve insulation; prevent condensation in humid areas
Assessing Structural Requirements Before Installation
Before purchasing or installing a skylight, you must evaluate whether your roof structure can support the additional weight and stress. Skylights add weight, create thermal bridges, and require careful framing to prevent leaks and structural failure.
Start by identifying your roof type: pitched (sloped) roofs, flat roofs, and domed roofs each present different installation challenges. For pitched roofs, skylights are typically easier to install because water naturally flows away. Flat roofs, common in urban Indian apartments, require additional slope or curbing to ensure proper drainage. Consult a structural engineer or experienced architect—professionals like those at Studio ARCPLUS CONSTRUCTION can assess load-bearing capacity and recommend reinforcement if needed.
Measure the roof opening carefully. A typical residential skylight ranges from 60 cm × 60 cm to 120 cm × 120 cm, but custom sizes are available. The roof framing must support the skylight frame without excessive deflection. In seismic zones (relevant for parts of India), additional bracing may be required by building codes.
Checking Local Building Codes and Permits
Indian building codes, including the National Building Code (NBC), set standards for skylight installation. Most municipalities require permits before cutting roof openings. Verify requirements with your local municipal corporation before starting work. Non-compliance can result in fines, difficulty selling the property, or mandatory removal of the installation.
Waterproofing: The Most Critical Step for Indian Climates
India's monsoon season brings heavy rainfall that tests every joint and seal in a skylight installation. Poor waterproofing is the leading cause of skylight failure and interior water damage. This step cannot be rushed or compromised.
The waterproofing system consists of multiple layers working together. First, the skylight frame itself must be sealed to the roof opening with a high-quality flashing kit—typically made of aluminum or galvanized steel. The flashing creates a barrier that directs water away from the opening. Second, a waterproof sealant (usually polyurethane or silicone-based) fills gaps between the flashing and the roof material. Third, the roof material itself (whether concrete, tiles, or asphalt) must be sealed around the perimeter.
For Indian climates with heavy monsoon rains, consider these additional measures:
- Use two-stage flashing systems that create a water-shedding path
- Apply waterproof membrane (bituminous or synthetic) under and around the flashing
- Ensure the skylight curb (the raised frame) is at least 15 cm above the roof surface to prevent water pooling
- Install internal gutters or drip edges inside the roof cavity to catch any water that breaches the outer seal
- Test the installation during heavy rain before declaring the project complete
Many homeowners in high-rainfall areas benefit from consulting experienced architects like those at Vastulinear Pvt Ltd, who understand regional weather patterns and can design robust waterproofing systems.
Step-by-Step Installation Process
Planning and Preparation
Begin by selecting the exact location for your skylight. Ideally, position it to maximize morning or afternoon light without creating excessive heat gain. In India's hot climate, skylights on north-facing roofs receive less direct sun and are often preferable. Avoid placing skylights directly above bedrooms if light control is important. Mark the opening on both the roof and the interior ceiling to ensure alignment.
Creating the Roof Opening
Once permits are approved, carefully cut the roof opening. This is the most critical juncture—improper cutting can compromise structural integrity. For pitched roofs, work from inside the attic, drilling pilot holes through the roof at the corners of the planned opening. From the roof, use these holes as guides. Cut through roofing material, underlayment, and framing carefully. For flat roofs, the process is similar but requires extra attention to ensure water doesn't pool at the cut edges.
Reinforce the opening by installing double headers (parallel beams) on either side if the opening spans more than 60 cm. This maintains structural strength and prevents sagging.
Installing the Flashing and Waterproofing
Fit the skylight flashing kit into the opening, ensuring it sits flush against the roof. The flashing should extend under the roofing material on the upper side and over the roofing material on the lower side. Apply waterproof sealant generously along all edges, using a caulking gun. Allow sealant to cure fully (typically 24-48 hours) before exposing it to water.
For pitched roofs, step flashing (overlapping L-shaped pieces) should be installed on the sides to handle water flowing down the slope. On flat roofs, ensure the flashing transitions smoothly to prevent water pooling.
Mounting the Skylight Unit
Once flashing is sealed and cured, position the skylight frame onto the flashing. Most modern skylights use a compression seal or rubber gasket that compresses as fasteners are tightened. Fasten the skylight frame to the flashing using corrosion-resistant fasteners (stainless steel or galvanized). Do not over-tighten, as this can crack the glass or distort the frame.
Interior Finishing and Insulation
From inside, install a skylight well (the interior frame that connects the roof opening to the ceiling opening). For sloped roofs, the well is typically angled. For flat roofs, a vertical well is common. Insulate the well cavity with fiberglass or foam board, maintaining at least 5 cm of insulation on all sides. This prevents thermal bridging and condensation.
Install a trim ring around the interior opening to create a finished appearance. Some homeowners add interior blinds or shades to control light and heat gain—particularly useful during Indian summers.
Managing Heat and Condensation in Indian Climates
India's tropical and subtropical climates present unique challenges for skylights. High humidity and temperature fluctuations can cause condensation on the interior surface of the glass, especially in coastal regions or during monsoon season.
To minimize condensation, ensure proper ventilation in the room below the skylight. Adequate air circulation prevents moisture from accumulating. If condensation persists, consider upgrading to double-glazed skylights with a thermal break (an insulating material separating the inner and outer frames). This maintains a warmer interior surface, reducing condensation.
For heat management, reflective or tinted glass reduces solar heat gain by 40-60% compared to clear glass. Alternatively, install exterior or interior blinds that can be closed during peak heat hours. In coastal areas with salt spray, ensure the skylight frame is made of marine-grade aluminum or stainless steel to resist corrosion.
Maintenance and Long-Term Care
A properly installed skylight requires minimal maintenance, but regular care extends its lifespan and prevents problems. Clean the exterior glass twice yearly (more often in dusty or coastal areas) using a soft brush and mild detergent. Avoid abrasive cleaners that scratch the glass surface.
Inspect the sealant and flashing annually, especially after the monsoon season. Look for cracks, gaps, or discoloration. Reseal any compromised areas immediately to prevent water infiltration. Check the interior for signs of water stains or condensation buildup, which indicate failing seals.
In areas prone to heavy winds, ensure fasteners remain tight and the frame shows no signs of movement. For skylights with moving parts (operable skylights), lubricate hinges and seals annually and test the opening mechanism to ensure smooth operation.
Frequently Asked Questions
What is the cost of installing a glass skylight in India?
The cost varies widely depending on size, glass type, and location. A basic 60 cm × 60 cm tempered glass skylight typically costs between ₹15,000 and ₹25,000 for the unit alone. Installation labor, flashing, waterproofing, and interior finishing can add another ₹20,000 to ₹50,000 or more, depending on roof complexity and local labor rates. Premium options with Low-E glass or double-glazing can exceed ₹1,00,000 for the complete installation.
How long does a skylight installation take?
A straightforward installation on a pitched roof typically takes 2-3 days: one day for structural preparation and opening, one day for flashing and waterproofing, and one day for mounting and interior finishing. Flat roof installations or complex structural modifications may take 4-7 days. Waterproof sealant cure time adds 1-2 days before the skylight can be exposed to rain.
Can I install a skylight on a flat roof apartment?
Yes, but flat roofs require extra attention to waterproofing because water doesn't naturally drain away. The skylight curb must be raised at least 15 cm above the roof surface, and the flashing must slope slightly to direct water outward. Many apartment buildings in Indian cities have successfully installed skylights on flat roofs using proper curbing and dual waterproofing membranes. Consult your building management and structural engineer first, as some buildings have load restrictions or shared roof spaces.
Which glass type is best for India's hot climate?
Low-E coated tempered glass is ideal for hot Indian climates because it reflects infrared heat while transmitting visible light. This reduces cooling costs and interior heat buildup. Tinted or reflective glass provides additional heat reduction but darkens the space. For maximum performance, specify double-glazed Low-E units with an air gap between panes. In coastal areas, ensure the glass and frame are rated for salt spray resistance.
What should I do if my skylight leaks?
First, identify the source of the leak by inspecting the exterior during or after rain. Look for gaps in the sealant, cracks in the flashing, or gaps between the frame and roof. Minor sealant gaps can be re-caulked with polyurethane or silicone sealant. If the flashing is damaged or separated, it must be re-sealed or replaced—this typically requires removing the skylight unit. For persistent leaks, consult a professional contractor who can perform a thorough inspection and remedial waterproofing.
Conclusion
Installing a glass skylight is a rewarding project that brings natural light, energy savings, and aesthetic appeal to Indian homes. Success depends on careful selection of glass type, thorough structural assessment, meticulous waterproofing, and skilled installation. By following this guide and working with experienced professionals, you can ensure your skylight performs reliably for decades, even in India's challenging climate conditions.
Ready to find qualified glass suppliers, architects, and installation contractors for your skylight project? Browse glassy.in, India's largest glass-business directory, to connect with verified professionals in your area who specialize in skylight installations and glass solutions.