
Mirrors
Mirrored Glass Walls: Installation Hacks & Illusion Design Tips
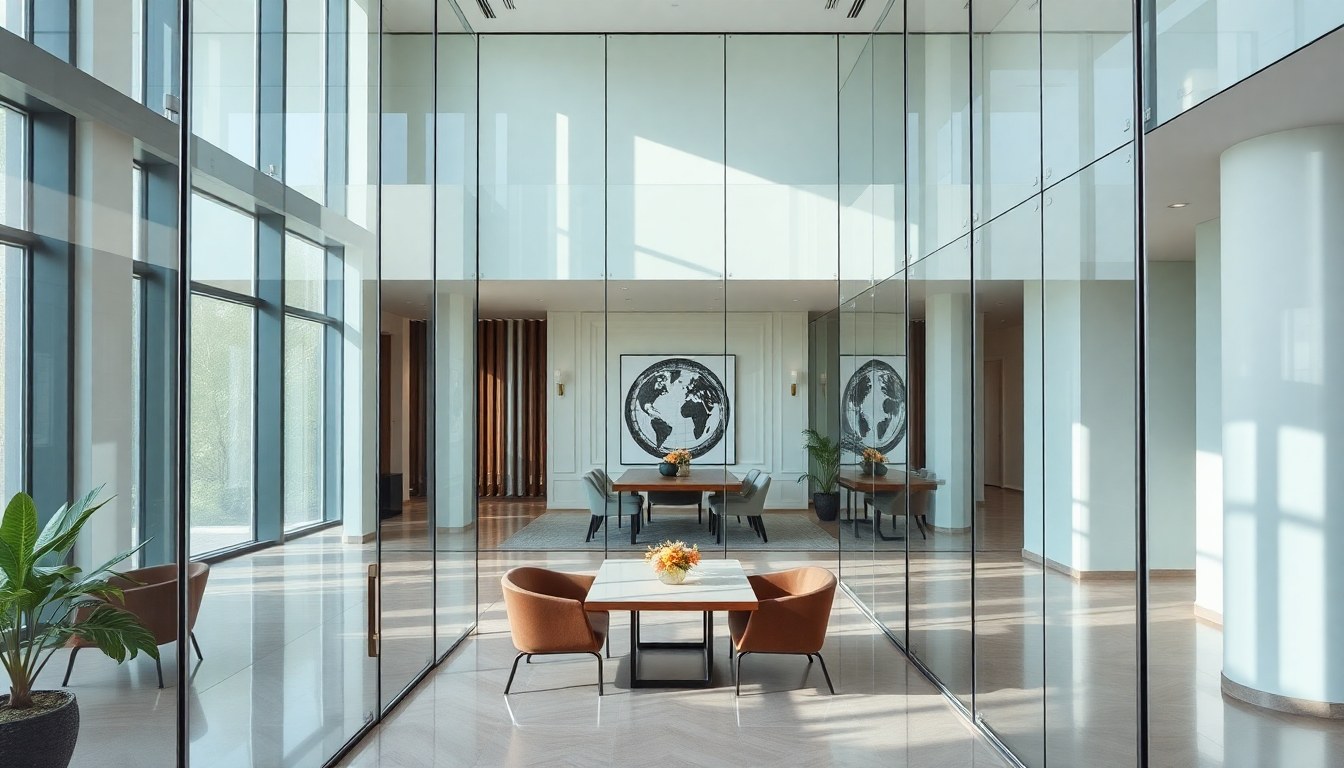
Mirrored glass walls are one of the most effective ways to amplify light and create the illusion of expanded space in compact apartments—especially valuable in cities like Hyderabad where real estate comes at a premium. Whether you're working with a tiny bedroom, a narrow hallway, or a cramped living room, strategic mirror placement combined with proper installation techniques can transform how a space feels. This guide walks you through the complete process of installing mirrored glass walls, choosing the right adhesives and frames, and leveraging design psychology to maximize visual impact.
Understanding Mirrored Glass Wall Basics
Mirrored glass walls consist of reflective glass panels mounted directly onto walls or fitted within frames. Unlike traditional standalone mirrors, full-wall installations create a seamless, immersive effect that dramatically alters spatial perception. The reflective surface bounces light around the room, making even north-facing apartments feel brighter and airier.
Before diving into installation, assess your wall condition. Walls must be clean, dry, and structurally sound. Check for moisture, cracks, or uneven surfaces using a level and straight edge. Any imperfections will show through the mirror and compromise the final appearance. In humid climates like Hyderabad's, moisture management is critical—poor ventilation behind mirrors can lead to mold and glass degradation over time.
- Wall assessment checklist: Check for moisture, level surfaces, structural integrity, and existing paint condition
- Room type considerations: Bathrooms need moisture-resistant backing; bedrooms can use standard adhesives
- Load capacity: Ensure walls can support the weight (mirrored glass typically weighs 10–15 kg per square meter)
Choosing the Right Adhesive for Mirror Installation
The adhesive you select determines the longevity and safety of your mirrored wall. Poor adhesive choice is the leading cause of mirror failure, peeling, and even dangerous falls. For Indian climates with varying humidity levels, durability matters more than upfront cost savings.
Best Adhesive Options
Mirror mastic or silicone-based adhesive is the industry standard for full-wall installations. Products like Sika or Bostik mirror adhesive are specifically formulated to bond glass to walls while remaining flexible enough to absorb thermal expansion. These typically cost ₹200–400 per liter and cover 2–3 square meters per liter. Silicone-based options are particularly effective in bathrooms and kitchens where moisture exposure is high.
Acrylic-based adhesives are budget-friendly (₹80–150 per liter) but less reliable in humid conditions. They're suitable for dry rooms only and may fail within 3–5 years in coastal or monsoon-prone areas. Double-sided foam tape works for lightweight mirrors up to 5 mm thickness but isn't recommended for large wall installations due to lower load capacity.
Always apply adhesive in a grid or dotted pattern rather than a continuous line. This prevents air pockets and allows the adhesive to cure evenly. Leave a 5–10 mm gap at the bottom to account for thermal expansion and allow moisture to escape.
Step-by-Step Installation Process
Preparation Phase
Start by measuring your wall accurately. Use a laser level or spirit level to mark guide lines where mirror panels will be positioned. Mark horizontal and vertical reference points every 60 cm—these act as anchors for alignment. Clean the wall thoroughly with a degreaser and allow it to dry completely (at least 24 hours in humid conditions).
If your wall is uneven (common in older Hyderabad buildings), apply a primer or base coat to improve adhesive grip. Sand any glossy paint surfaces lightly with 120-grit sandpaper to enhance mechanical adhesion.
Adhesive Application
Apply mirror adhesive in a grid pattern using a caulking gun or trowel. For a 1 meter × 1 meter panel, use 12–16 dots of adhesive (roughly 25 mm diameter each) spaced evenly. Ensure adhesive is applied to both the wall and the back of the mirror panel for maximum bonding strength.
Work in sections rather than attempting an entire wall at once. This gives you better control and allows you to make micro-adjustments before adhesive sets. Most mirror mastics require 24–48 hours to fully cure before the mirror can support its full weight.
Panel Placement and Alignment
Press each mirror panel firmly onto the wall, starting from the bottom and working upward. Use a rubber mallet and wooden block to tap gently and ensure full contact without applying excessive force (which can crack glass). Check alignment continuously with a level—even 2–3 mm misalignment becomes obvious when light reflects across the surface.
For large installations spanning multiple panels, use spacer shims between panels to maintain consistent 2–3 mm gaps. These gaps accommodate thermal movement and allow for easier cleaning. Once all panels are positioned, allow the adhesive to cure fully before grouting or caulking the gaps.
Frame Options and Finishing Touches
Framing mirrored walls serves both aesthetic and functional purposes. Frames hide edges, provide a finished look, and protect glass corners from impact damage.
Framing Materials in India
Aluminum frames are the most popular choice—durable, moisture-resistant, and available in various finishes (brushed, anodized, or painted). Prices range from ₹150–350 per running meter. Wooden frames (typically teak or pine) offer warmth but require regular maintenance and are prone to warping in humid climates. Stainless steel frames cost ₹300–600 per meter but are ideal for bathrooms and kitchens due to superior corrosion resistance.
For a modern, seamless look popular in contemporary Hyderabad apartments, consider frameless installations with subtle aluminum trim at edges only. This minimalist approach maximizes the spatial illusion effect while maintaining a clean aesthetic.
Caulking and Grouting
After adhesive cures, caulk gaps between panels using clear silicone sealant. This prevents moisture penetration and dust accumulation. Avoid white or colored caulk unless it matches your frame—transparent caulk is nearly invisible and maintains the mirror's visual continuity.
Design Tricks to Expand Small Rooms
Strategic mirror placement amplifies light and creates depth illusions that make compact spaces feel significantly larger. The key is understanding how light travels and where reflections create maximum impact.
Placement Strategy for Maximum Effect
Opposite windows: Position mirrored walls directly across windows to double the apparent light source. This is especially effective in north-facing rooms common in Hyderabad where natural light is limited. The reflection creates a "second window" that brightens the entire space.
Corner placement: Mirroring an entire corner (two perpendicular walls) creates a dramatic depth effect. This technique is ideal for small bedrooms or living rooms and costs roughly 30% more than single-wall installation but delivers proportionally greater visual impact.
Accent walls: For budget-conscious installations, mirror only 50–70% of a wall rather than the full height. This breaks up the space visually while reducing costs. Pair it with complementary paint colors—lighter shades above the mirror line enhance the expansion effect.
Color and Lighting Coordination
Pair mirrored walls with warm, soft lighting (2700K–3000K color temperature). Harsh white light (5000K+) creates unflattering reflections and can feel clinical in small spaces. Install dimmable LED strips along the mirror frame's edge to create ambient lighting that enhances the illusion of depth.
Paint walls adjacent to mirrors in light, neutral tones—whites, soft grays, or pale blues. Dark colors absorb light and contradict the expansion effect. In Hyderabad's warm climate, cooler tones (soft blues, greens) psychologically create a sense of spaciousness and airiness.
Furniture and Styling Tips
- Position key furniture pieces (bed, sofa) perpendicular to mirrored walls to maximize reflection visibility
- Keep clutter minimal—mirrors amplify visual chaos just as effectively as they amplify space
- Use low-profile furniture to maintain sightlines across the room
- Avoid placing dark or bulky items directly in front of mirrors—they block reflections and reduce the expansion effect
Common Installation Mistakes to Avoid
Rushing the wall preparation phase is the most common error. Many homeowners skip proper cleaning or leveling, resulting in visible imperfections and premature adhesive failure. Budget at least 2–3 days for preparation, especially in humid conditions.
Underestimating adhesive quantity is another frequent mistake. Skimping on adhesive to save money creates weak bonds and increases the risk of panels slipping or cracking. Use the manufacturer's recommended coverage rates—typically 1 liter per 2–3 square meters.
Installing mirrors in bathrooms without proper ventilation backing leads to moisture accumulation and mold growth. Always ensure bathroom mirrors have moisture-resistant backing and adequate ventilation behind the installation. Leave the bottom edge unsealed to allow air circulation.
Frequently Asked Questions
How much does mirrored wall installation cost in Hyderabad?
Costs vary based on glass quality, frame selection, and wall condition. Budget ₹1,500–3,500 per square meter for materials and professional installation. A typical 10 square meter bedroom wall costs ₹15,000–35,000. DIY installation reduces costs by 30–40% if you have basic carpentry skills, but mistakes can be expensive to fix.
Can I install mirrored walls in bathrooms?
Yes, but use moisture-resistant backing and silicone-based adhesives specifically formulated for wet environments. Ensure adequate ventilation and avoid sealing the bottom edge completely. Bathroom mirrors typically last 10–15 years with proper maintenance, compared to 15–20 years in dry rooms.
How do I clean and maintain mirrored walls?
Clean monthly using a microfiber cloth and glass cleaner (or a 50/50 vinegar-water solution). Avoid abrasive scrubbers that scratch the reflective coating. Check caulk seals annually and reseal if gaps appear. In humid climates, inspect for moisture or discoloration behind the mirror—these signs indicate adhesive failure requiring professional re-installation.
Will mirrored walls make my room feel too reflective or cold?
Not if designed thoughtfully. Limit mirrors to 50–70% of wall space, pair with warm lighting, and use complementary furnishings to create balance. Frameless or subtly framed mirrors feel more modern and less institutional than heavily framed versions. The key is strategic placement rather than full coverage.
How long does mirrored wall adhesive take to cure?
Most mirror mastics require 24–48 hours for initial set and 5–7 days for full cure. Avoid touching or cleaning the mirror during this period. Humidity and temperature affect curing time—in Hyderabad's monsoon season, add 24–48 hours to cure times. Check the manufacturer's specifications for your specific adhesive product.
Transform Your Space Today
Mirrored glass walls are a proven, cost-effective solution for expanding small rooms and amplifying natural light in compact Indian homes. Whether you're tackling a DIY project or hiring professionals, understanding installation fundamentals and design principles ensures lasting results. Explore verified mirror suppliers and installation specialists in your area through the glassy.in directory—India's most comprehensive glass business network—to find trusted vendors who deliver quality materials and expert craftsmanship for your next project.