
Glass Railings
How to Install Glass Railings on Outdoor Staircases: Step-by-Step Guide
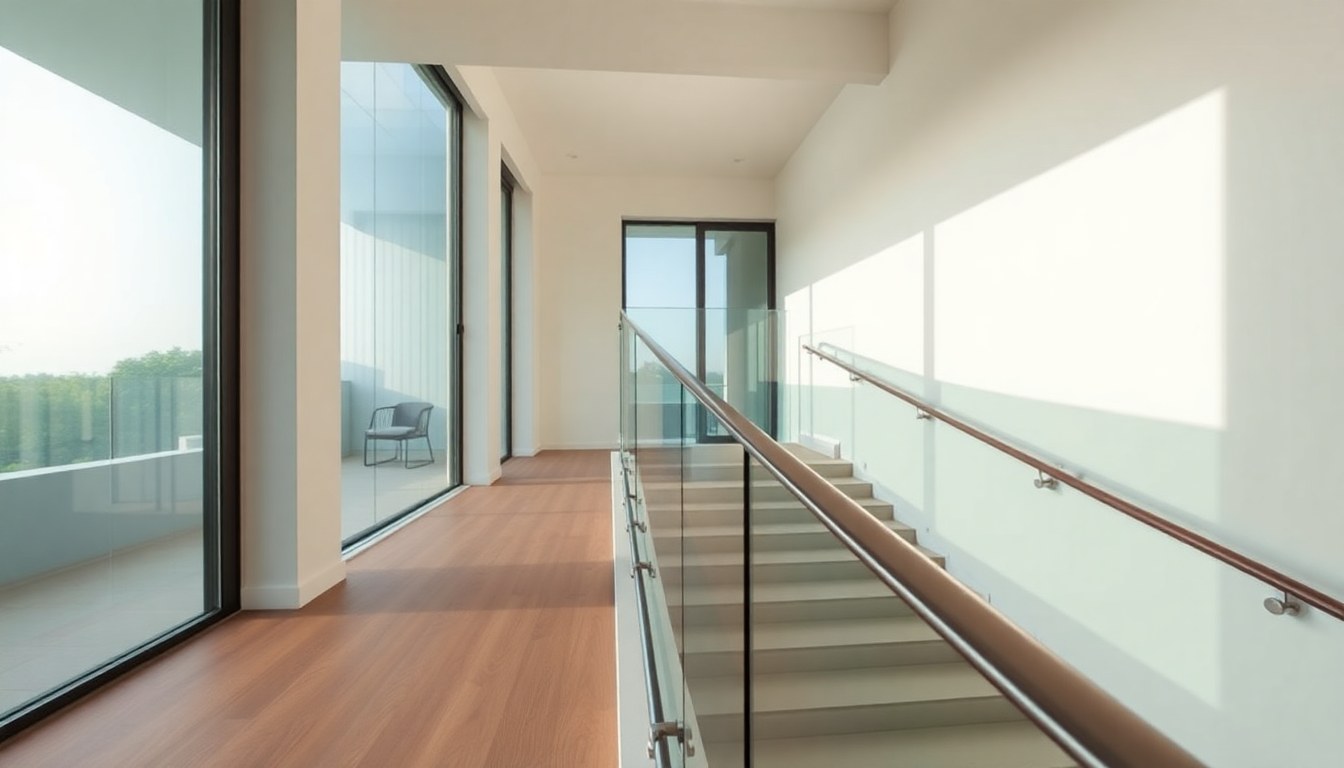
Glass railings on outdoor staircases combine elegance with functionality, offering unobstructed sightlines while meeting safety requirements. Whether you're upgrading an existing staircase or building new, understanding the proper installation process ensures durability, safety, and long-term performance in India's diverse climate conditions. This comprehensive guide covers everything from planning and materials to anchoring techniques and weatherproofing.
Understanding Glass Railing Systems and Building Codes
Before purchasing materials or tools, familiarize yourself with Indian building standards and local municipal regulations. Glass railings for outdoor staircases must comply with the National Building Code of India (NBC), which specifies minimum heights (typically 900mm for residential properties), load-bearing capacity (minimum 1.2 kN/m lateral load), and glass thickness requirements. These standards exist to prevent accidents and ensure structural integrity.
Different states and municipalities may have additional requirements, so consult your local municipal corporation or building authority before beginning work. For outdoor installations, you'll also need to consider wind load calculations specific to your region—coastal areas and elevated locations require stronger anchoring systems. Many professional installers recommend engaging a structural engineer for verification, especially for staircases exposed to harsh weather.
Choosing the Right Glass Type
Outdoor glass railings require tempered or toughened glass, never annealed glass. Tempered glass is heat-treated to withstand temperature fluctuations, UV exposure, and impact better than standard glass. For outdoor staircases in India, 12mm or 15mm tempered glass is standard, with 12mm suitable for most residential applications and 15mm recommended for high-traffic areas or regions with extreme weather. Laminated glass (combining two layers with an interlayer) is an excellent choice for added safety—if breakage occurs, the interlayer holds fragments together.
Consider the finish as well: clear glass offers maximum visibility, frosted glass provides privacy while maintaining light transmission, and tinted glass reduces glare and heat absorption. For outdoor settings, anti-reflective coatings reduce glare and improve aesthetics, though they add to the cost.
Materials and Tools You'll Need
Gathering the right materials and tools before starting prevents delays and ensures professional results. Here's what you'll need:
- Glass panels: Tempered glass cut to specifications (12-15mm thickness)
- Stainless steel or aluminum frames/channels: For outdoor durability, always choose stainless steel (304 or 316 grade) rather than mild steel, which rusts
- Mounting brackets and hardware: Stainless steel bolts, washers, and anchors rated for outdoor use
- Sealants and adhesives: Silicone sealant rated for outdoor use (typically 100% silicone)
- Weatherproofing materials: Rubber gaskets, EPDM seals, and waterproofing tape
- Tools: Drill with masonry bits, torque wrench, level, measuring tape, safety glasses, work gloves, and appropriate fasteners
Quality matters significantly with outdoor installations. Investing in premium stainless steel hardware and marine-grade sealants protects your investment from rust, water damage, and UV degradation—common issues in India's tropical and monsoon-affected regions.
Step-by-Step Installation Process
Step 1: Measure and Mark Anchor Points
Accurate measurements are critical for a level, safe installation. Measure the full length and height of your staircase, then determine the exact positions where glass panels will mount. Mark anchor points on both the staircase structure and the top rail location, ensuring they align vertically. Use a level to verify that marked points are plumb (perfectly vertical), as even slight misalignment causes installation problems and compromises safety.
For outdoor staircases, anchor points should be spaced 600-900mm apart along the railing length. Mark these positions clearly with a marker or chalk, then double-check measurements before drilling any holes.
Step 2: Prepare the Mounting Surface
Clean the mounting surfaces thoroughly, removing dirt, algae, or old sealant. For concrete or stone staircases, use a wire brush or pressure washer (at low pressure to avoid damage). For metal surfaces, remove any rust with a wire brush and apply a rust converter if needed. Dry surfaces completely—moisture trapped beneath railings causes rust and sealant failure.
If installing on concrete, you may need to use chemical anchors (epoxy-based) for superior holding power, especially in high-wind areas. Apply the epoxy according to manufacturer instructions and allow full curing time before proceeding.
Step 3: Install Base Channels and Brackets
Begin by installing the base channel (the bottom horizontal frame that holds glass panels). Position it along your marked line and secure it with stainless steel bolts, ensuring it's perfectly level. Use a level tool and tighten bolts in a cross pattern to ensure even pressure distribution. Avoid over-tightening, which can crack glass or damage threads.
Next, install the vertical mounting brackets or posts at your marked intervals. These brackets support the glass panels and distribute loads to the staircase structure. Ensure all brackets are plumb (vertical) before tightening completely. Apply waterproofing tape around bolt holes to prevent water ingress.
Step 4: Install Glass Panels
Carefully position the first glass panel into the base channel. Most outdoor glass railings use a "dry-glazed" system where glass sits in rubber gaskets rather than being adhered directly—this allows for thermal expansion and contraction in outdoor environments. Slide the glass panel into the gasket, ensuring it sits fully and evenly.
Secure the glass panel using top channels or clamps, again ensuring it's vertical and level. Tighten fasteners gradually and evenly, checking alignment frequently. Repeat this process for each panel, working systematically along the staircase length. Leave small gaps (typically 5-10mm) between panels to allow for expansion and prevent binding.
Step 5: Seal and Weatherproof
Weatherproofing is critical for outdoor installations in India's monsoon climate. Apply high-quality outdoor silicone sealant along all joints, gaps, and connections between glass panels, frames, and the staircase structure. Use a caulking gun to apply sealant smoothly and consistently. Smooth the sealant with a wet finger or caulk tool to ensure proper adhesion and appearance.
Allow sealant to cure fully (typically 24-48 hours depending on product) before exposing the railing to water. Apply waterproofing tape around all bolt holes and penetrations. Consider applying a protective coating to metal frames—stainless steel benefits from occasional waxing to maintain appearance and provide additional UV protection.
Safety Compliance and Testing
Once installation is complete, verify that your glass railing meets all safety requirements before considering the project finished. The railing should be able to withstand a minimum horizontal load of 1.2 kN/m (approximately 120 kg force distributed across the railing) without deflecting more than 6mm. You can test this by applying firm pressure along the railing—it should feel solid and immovable.
Check that the railing height meets local codes (typically 900-1050mm from the staircase nosing) and that glass panels are securely fastened with no movement or rattling. Inspect all sealant lines for completeness and gaps. If you're unsure about compliance, consider having a structural engineer or building official inspect the installation before use.
For outdoor installations, check the railing after the first monsoon season to ensure sealants have held and no water has infiltrated behind panels. Address any issues immediately to prevent long-term damage.
Maintenance Tips for Long-Term Durability
Proper maintenance extends the life of your glass railing installation significantly. Clean glass panels regularly with mild soap and water, using a soft cloth to avoid scratches. In coastal areas, rinse with fresh water monthly to remove salt spray, which accelerates corrosion.
Inspect sealant annually and reapply where it has cracked or deteriorated. Check stainless steel hardware for any signs of corrosion (though true stainless steel rarely rusts, low-grade stainless can corrode in harsh environments). Clean metal frames with appropriate stainless steel cleaner to maintain appearance and remove any surface oxidation.
In regions with heavy pollution or salt exposure, consider applying a protective coating to metal components every 2-3 years. For professional installations and maintenance, consult specialists like Studio IN-GRID, which offers expert guidance on glass railing systems and long-term care strategies.
Common Installation Mistakes to Avoid
Understanding common pitfalls helps ensure a successful installation. Never use mild steel hardware outdoors—it rusts quickly despite initial cost savings. Avoid over-tightening fasteners, which stresses glass and can cause cracking. Don't skip weatherproofing; exposed gaps and unsealed joints lead to water damage and structural failure.
Ensure glass panels are cut to exact specifications—undersized panels won't fit properly, while oversized panels can crack during installation. Always use tempered glass, never annealed glass, for safety and durability. Finally, don't attempt installation without understanding local building codes; non-compliant installations may require costly removal and reinstallation.
When to Hire Professional Installers
While DIY installation is possible for experienced individuals, professional installation offers significant advantages. Experienced installers understand regional climate challenges, ensure code compliance, and carry insurance for liability. They have specialized tools for precise measurements and cutting, reducing errors and material waste.
For complex staircases, high-rise installations, or areas with strict building codes, professional installation is strongly recommended. Many glass railing manufacturers and installers across India offer consultation and installation services—obtaining multiple quotes helps you understand pricing and service options for your specific project.
Frequently Asked Questions
What is the minimum thickness of glass required for outdoor staircase railings in India?
The National Building Code of India recommends minimum 12mm tempered glass for residential outdoor railings. For high-traffic areas, areas exposed to extreme weather, or commercial installations, 15mm tempered glass is preferred. Laminated glass (12mm or 15mm) provides additional safety benefits by holding fragments together if breakage occurs.
How often should I maintain my outdoor glass railings?
Inspect your glass railings at least twice yearly—before and after the monsoon season. Clean glass monthly with mild soap and water. Check sealant annually and reapply where it has cracked. In coastal areas or high-pollution zones, increase inspection frequency to quarterly. Stainless steel hardware requires minimal maintenance but benefits from occasional cleaning with stainless steel cleaner.
Can I install glass railings on an existing outdoor staircase myself?
DIY installation is possible if you have experience with power tools and understand building codes. However, professional installation is recommended for most homeowners because it ensures code compliance, proper weatherproofing, and structural integrity. Mistakes during installation can compromise safety and lead to costly repairs or removal and reinstallation.
What sealant should I use for outdoor glass railing installations?
Use only 100% silicone sealant rated for outdoor use. Avoid acrylic or polyurethane sealants, which degrade quickly under UV exposure and temperature cycling. Choose marine-grade silicone for maximum durability in harsh coastal environments. Allow full curing time (24-48 hours) before exposing the railing to water or weather.
Why is stainless steel hardware essential for outdoor installations?
Stainless steel resists rust and corrosion from moisture, salt spray, and UV exposure far better than mild steel or galvanized steel. In India's tropical climate and monsoon regions, stainless steel hardware maintains structural integrity and appearance over decades. While more expensive initially, stainless steel prevents costly repairs and replacement, making it a worthwhile investment for outdoor installations.
Glass railings transform outdoor staircases into beautiful, functional spaces that enhance property value and safety. Whether you're planning a DIY installation or hiring professionals, understanding the complete process ensures excellent results. Explore trusted glass railing providers and installers through glassy.in, India's comprehensive glass business directory, to find specialists in your region who can help bring your vision to life.