
Glass Railings
Glass Railing Installation: Step-by-Step Guide for Balconies
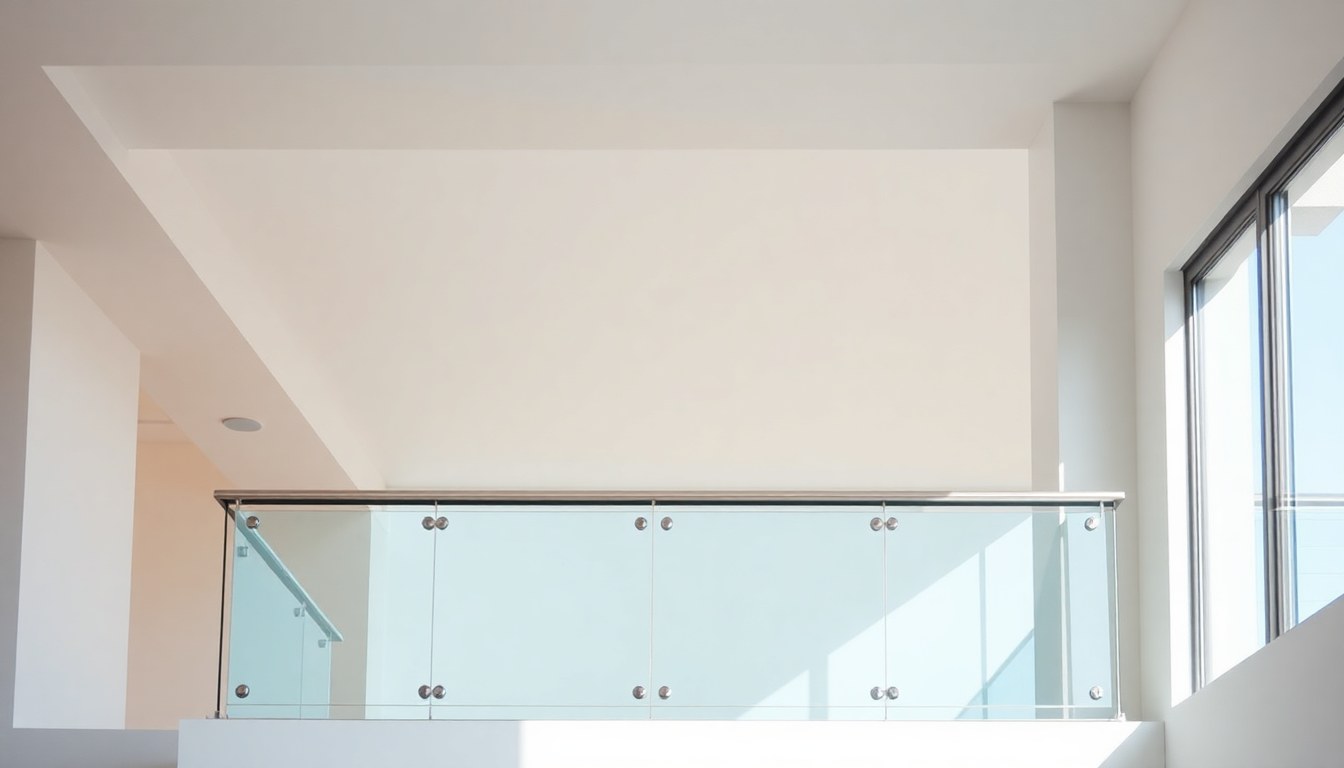
A glass railing can completely transform your balcony, creating an unobstructed view while maintaining safety and elegance. Whether you're upgrading an existing railing or installing one from scratch, understanding the installation process helps you avoid costly mistakes and ensures compliance with Indian building codes. This guide covers everything from planning and material selection to the final installation, helping both homeowners and contractors execute a professional glass railing installation.
Understanding Glass Railing Types and Building Codes
Before you begin installation, it's critical to understand the two main types of glass railings available in India: frameless and semi-frameless systems. Frameless railings use tempered glass panels held in place by stainless steel clamps and minimal hardware, creating a sleek, modern look. Semi-frameless designs incorporate aluminum or steel frames around the glass, offering slightly more structural support and easier installation for DIY projects.
Indian building codes, particularly those outlined in the National Building Code (NBC) 2016, mandate specific safety requirements for railings. The code requires railings to be at least 1.1 meters (3.6 feet) high for residential balconies and capable of withstanding a horizontal load of 1.5 kN per meter. Glass panels must be tempered or laminated to prevent shattering, and any gaps in the railing must be smaller than 100mm to prevent children from getting stuck. Verify these requirements with your local municipal corporation before purchasing materials, as some cities have additional regulations.
Pre-Installation Planning and Material Selection
Measuring and Designing Your Railing
Accurate measurements are the foundation of a successful installation. Measure the length of your balcony perimeter where the railing will be installed, the height from the floor to the top of the existing railing or support structure, and note any obstacles like pipes, vents, or electrical outlets. Use a level to check if your balcony floor is even—uneven surfaces can cause alignment issues during installation.
Document the direction your balcony faces, as this affects the type of glass you should choose. North-facing balconies benefit from clear glass, while south or west-facing balconies may require tinted or reflective glass to reduce heat absorption and glare. Take photographs and measurements to share with your glass supplier or contractor.
Selecting Quality Materials
Purchase tempered glass panels of at least 10mm thickness for residential balconies. Tempered glass is heat-treated to be 4-5 times stronger than regular glass and shatters into small, harmless pieces if broken, rather than sharp shards. For coastal areas or regions with high humidity, consider laminated glass or apply protective coatings to prevent corrosion of metal fixtures.
Choose stainless steel 304 or 316 grade hardware for clamps, brackets, and fasteners. These grades resist rust and corrosion far better than mild steel, especially in Indian climates with high moisture. Avoid aluminum frames in coastal regions; if you must use them, ensure they have marine-grade anodizing. Budget approximately ₹800 to ₹1,500 per linear meter for materials, depending on glass thickness and frame type.
Tools and Equipment You'll Need
Gather the following tools before you start installation:
- Cordless drill-driver with masonry bits for concrete balconies
- Spirit level (at least 1 meter long)
- Measuring tape and chalk for marking
- Stainless steel clamps, brackets, and fasteners specific to your glass thickness
- Rubber mallets for gentle adjustments
- Silicone sealant and caulking gun for weatherproofing
- Safety equipment: work gloves, safety glasses, and dust masks
- Suction cups or glass lifters for handling heavy panels safely
If your balcony is on an upper floor or the railing is particularly long, rent scaffolding or use safety harnesses. Never work at heights without proper fall protection, and avoid installation during windy weather that could destabilize glass panels.
Step-by-Step Installation Process
Step 1: Prepare the Installation Surface
Clean the balcony floor and the top surface where the railing will be mounted. Remove any old railing debris, dirt, and loose material. If installing on concrete, ensure the surface is dry and level. For wooden balconies, check for rot or structural damage and repair as needed. Mark the railing location with chalk, ensuring it's parallel to the balcony edge and at the correct height according to building codes.
Step 2: Install Base Channels or Support Frames
For frameless systems, install stainless steel base channels along the marked line. Drill pilot holes at 300mm intervals, then secure the channels with expansion bolts or concrete screws rated for your specific floor material. For semi-frameless systems, install the aluminum frame according to the manufacturer's specifications. Use a level constantly to ensure the base is perfectly horizontal—any deviation will affect the entire railing's appearance and safety.
Step 3: Position and Secure Glass Panels
With assistance, carefully lift the first tempered glass panel using suction cups. Position it into the base channel, ensuring it's centered and plumb (perfectly vertical). Insert stainless steel clamps at the top and bottom of the panel, tightening them gradually and evenly to avoid stress on the glass. Leave a 3-5mm gap between panels to allow for thermal expansion and contraction—this is critical in India's varied climate conditions.
Continue this process for each panel, checking alignment with a level after every installation. Frameless systems require precision here; even slight misalignment becomes visible to the eye.
Step 4: Install Top Rails and Hardware
Once all glass panels are secured, install the top rail (if using a semi-frameless system) or top clamps (for frameless systems). Ensure the top rail is securely fastened and level. For frameless railings, the top clamps serve as both structural support and a finished edge, so they must be tight and properly aligned.
Step 5: Seal and Weatherproof
Apply high-quality silicone sealant to all joints where glass meets metal, and along the base channel. Use a caulking gun to ensure even application. Silicone is preferable to other sealants because it remains flexible as temperatures change, preventing cracks and water infiltration. Smooth the sealant with a wet finger or caulk tool for a professional finish. Allow 24-48 hours for the sealant to cure fully before exposing the railing to water or heavy use.
Step 6: Final Inspection and Testing
Once installation is complete, perform a thorough safety check. Apply firm horizontal pressure to the railing at various points to ensure it doesn't flex excessively. Verify that all fasteners are tight and that no gaps exceed 100mm. Check that the railing height meets the 1.1-meter minimum. Clean the glass with a soft cloth and mild detergent to remove fingerprints and dust.
Common Mistakes to Avoid
One of the most frequent errors is using non-tempered glass or glass thinner than 10mm. Regular glass is dangerous on balconies and violates building codes. Another common mistake is improper spacing between panels—gaps that are too large allow children's heads to fit through, creating a serious safety hazard.
Poor weatherproofing is equally problematic. Failing to seal joints properly allows water to seep behind panels, causing rust on metal components and structural damage over time. Many installers also underestimate the importance of a perfectly level base; even a 5mm deviation compounds across a long balcony and creates visible misalignment.
Finally, avoid using mild steel hardware. It rusts quickly in India's humid climate, staining the glass and compromising structural integrity. Always invest in stainless steel 304 or higher grade components, even if the upfront cost is higher.
Maintenance Tips for Long-Lasting Glass Railings
Clean your glass railing monthly with a soft microfiber cloth and a mixture of equal parts white vinegar and water. This removes dust, fingerprints, and mineral deposits that can accumulate in humid climates. Avoid abrasive cleaners that scratch the glass surface.
Inspect the silicone sealant annually, especially after the monsoon season. If you notice cracks or gaps, remove the old sealant with a caulk removal tool and apply fresh silicone. Check all fasteners and clamps twice yearly; tighten any that have loosened due to vibration or thermal movement. In coastal areas, rinse the railing with fresh water occasionally to remove salt spray that accelerates corrosion.
When to Hire a Professional
While semi-frameless glass railings can be installed by experienced DIYers, frameless systems require precision and specialized knowledge. If your balcony is on an upper floor, has an irregular shape, or if you're uncomfortable working at heights, hire a professional installer. The cost of professional installation—typically ₹2,000 to ₹5,000 per linear meter—is worth the assurance of safety and warranty coverage.
Reputable glass railing specialists in India, such as Studio IN-GRID, offer design consultation, custom fabrication, and professional installation with structural guarantees. They understand local building codes and climate-specific requirements, ensuring your railing meets all safety standards.
Frequently Asked Questions
What is the minimum height for a glass railing on a residential balcony in India?
According to the National Building Code (NBC) 2016, the minimum height for a residential balcony railing is 1.1 meters (approximately 3.6 feet) measured from the finished floor level. This height is designed to prevent accidental falls while maintaining an unobstructed view. Always verify with your local municipal building department, as some cities may have slightly different requirements.
Can I install a glass railing myself, or do I need a professional?
Semi-frameless glass railings with aluminum frames can be installed by homeowners with basic DIY skills and the right tools. However, frameless glass railings require professional expertise due to the precision needed for safety and aesthetics. If your balcony is on an upper floor or has an irregular shape, professional installation is strongly recommended. Always prioritize safety over cost savings.
How much does a glass railing installation cost in India?
Material costs typically range from ₹800 to ₹1,500 per linear meter, depending on glass thickness, type (clear, tinted, or laminated), and frame material. Professional installation adds ₹2,000 to ₹5,000 per linear meter. A typical 10-meter balcony railing might cost ₹15,000 to ₹35,000 for materials and labor combined. Prices vary by city and supplier, so obtain multiple quotes before deciding.
What type of glass should I use for a balcony railing?
Use tempered glass of at least 10mm thickness for residential balconies. Tempered glass is heat-treated to be much stronger than regular glass and shatters safely into small pieces if broken. For coastal areas or high-humidity regions, consider laminated glass for added durability. Tinted or reflective glass is suitable for south or west-facing balconies to reduce heat and glare.
How do I maintain my glass railing to prevent rust and staining?
Clean the glass monthly with a soft cloth and a vinegar-water solution. Inspect silicone sealant annually and reseal if cracks appear. Check all stainless steel fasteners and clamps twice yearly for tightness. In coastal areas, rinse the railing with fresh water occasionally to remove salt spray. Use only stainless steel 304 or higher grade hardware to prevent rust in India's humid climate.
Get Professional Glass Railing Installation Help
Installing a glass railing is a significant home improvement project that enhances both safety and aesthetics. Whether you choose to DIY a semi-frameless system or hire a professional for a frameless installation, following these steps and safety guidelines ensures a beautiful, durable result that complies with Indian building codes. Explore verified glass railing specialists and suppliers on the Glassy.in directory to find trusted professionals in your area who can guide you through the process and deliver expert installation.