
Glass Guides
How to Retrofit Old Wooden Staircases with Frameless Glass Balusters
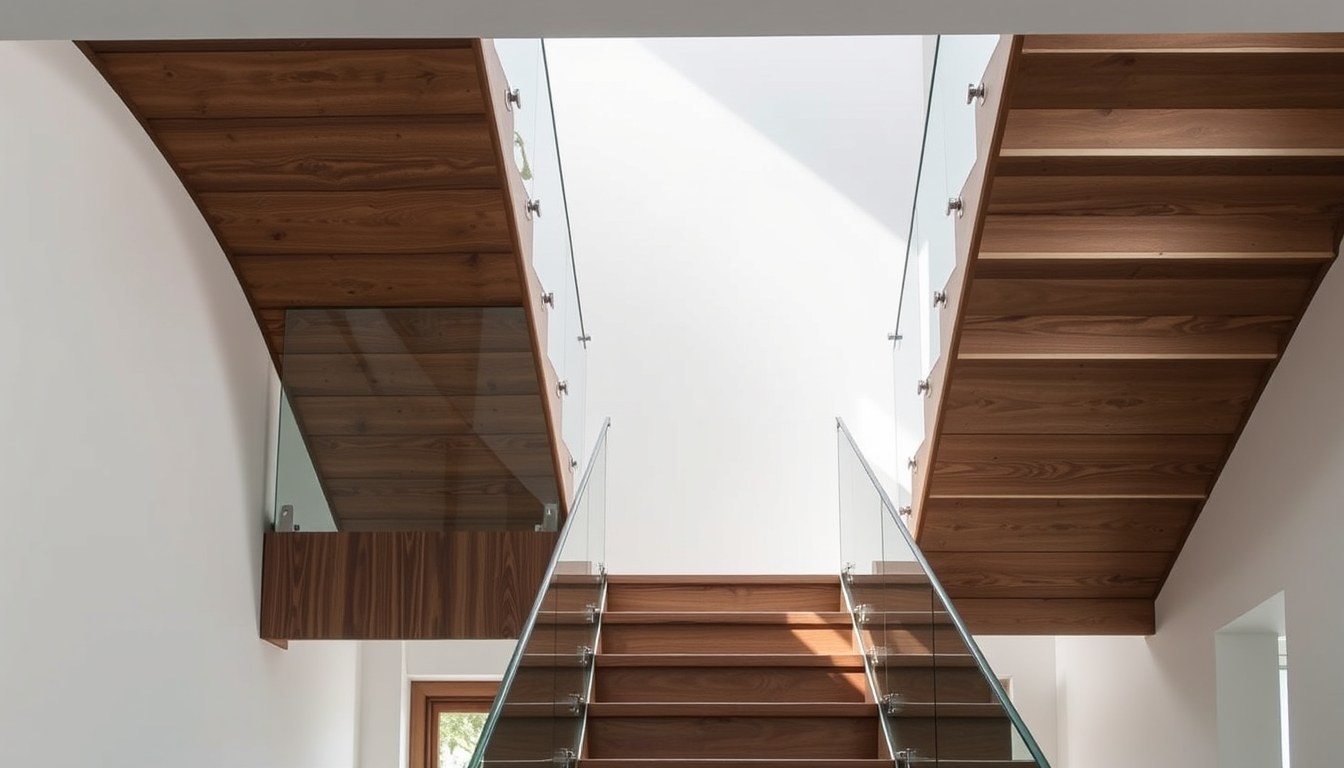
Retrofitting an old wooden staircase with frameless glass balusters is one of the most effective ways to modernize your home while preserving the character of existing architecture. Unlike complete staircase replacements, this upgrade requires minimal structural changes and can be completed in a few days, instantly transforming your interior with an open, contemporary aesthetic. Whether you're looking to brighten a dark stairwell or create a more spacious feel, frameless glass balusters offer the perfect balance of safety, style, and practicality.
Understanding Frameless Glass Balusters
Frameless glass balusters are sleek, minimalist railings made from tempered glass panels that require no visible metal framing or support structure. Unlike traditional balusters with visible posts and rails, frameless designs create an unobstructed view, making staircases appear lighter and more open. The glass is typically 12mm or 10mm tempered glass, which is both durable and safe, as it shatters into small, harmless granules if broken.
The key advantage of frameless systems is their versatility—they work equally well with modern and traditional wooden staircases. They also require no painting or maintenance beyond occasional glass cleaning, making them ideal for busy households. When retrofitting, you're essentially replacing traditional wooden balusters with glass panels while keeping your existing wooden steps, stringers, and handrails intact.
Why Choose Frameless Over Traditional Balusters?
Frameless glass balusters offer several benefits over conventional wooden or metal alternatives. They don't accumulate dust like spindles do, they allow natural light to flow freely through your stairwell, and they comply with modern building codes regarding safety and visibility. For homeowners in Indian cities like Delhi, Mumbai, and Bangalore, where apartment spaces are often compact, the visual lightness of frameless glass makes staircases feel less imposing and creates better sightlines.
Pre-Installation Assessment and Planning
Before purchasing materials or hiring professionals, conduct a thorough inspection of your existing staircase. Measure the staircase width, the height of each step, and the distance from the nosing (the front edge of the step) to where the baluster will sit. Check for any damage to the wooden structure—rotting wood, loose treads, or compromised stringers should be repaired before installation begins.
Verify that your staircase meets local building codes. In India, the National Building Code (NBC) specifies that balusters must prevent a 100mm sphere from passing through and must withstand a lateral force of 1.2 kN. Frameless glass systems automatically meet these requirements when installed correctly. Consult with your local municipal corporation or a qualified architect like those at R HOMME BUILDWELL if you're uncertain about compliance.
Measuring and Calculating Material Requirements
Accurate measurements are critical. For each section of the staircase, measure the height from the top surface of the tread to the underside of the handrail. This dimension determines the height of your glass panels. Measure the horizontal distance along the staircase (the run) to calculate how many panels you'll need. Most frameless systems use panels 1200mm wide, though custom sizes are available.
Create a detailed sketch of your staircase layout, marking each section where glass will be installed. Include measurements for any curved sections, landings, or corners. This documentation is essential when ordering materials or requesting quotes from glass suppliers.
Materials and Tools Required
Installing frameless glass balusters requires specific materials and equipment. Here's what you'll need:
- Tempered glass panels – 12mm thickness for optimal durability and safety
- Glass-to-glass connectors – aluminum or stainless steel U-channels that join panels
- Base shoe or bottom rail – typically aluminum, mounted to the staircase treads
- Top rail or handrail connection hardware – stainless steel brackets for secure mounting
- Silicone sealant – clear, structural-grade for weatherproofing and vibration damping
- Mounting bolts and fasteners – stainless steel to prevent corrosion
Essential tools include a tape measure, laser level, drill with masonry bits, socket wrench set, glass cutter (for minor adjustments), and safety equipment including gloves and eye protection. Many homeowners opt to hire professional installers from reputable glass shops like MAHAVIR GLASS AND HARDWARE or Rex Glass, which ensures proper installation and warranty coverage.
Step-by-Step Installation Process
Step 1: Prepare the Staircase Surface
Begin by removing the existing wooden balusters. This typically involves unscrewing or prying out the old spindles from their mounting points on the handrail and treads. Sand down any rough spots or adhesive residue on the treads and handrail where new hardware will mount. Ensure all surfaces are clean and dry before proceeding.
Step 2: Install the Base Rail
The base rail is the foundation of your frameless system. Position the aluminum base shoe along the edge of each tread, typically 50-75mm from the step nosing. Mark the mounting holes using a pencil, then drill pilot holes into the wooden tread. Use stainless steel bolts or screws to secure the base rail, ensuring it's perfectly level on each step. Use a laser level to verify alignment across the entire staircase.
Step 3: Set the First Glass Panel
Carefully position the first tempered glass panel into the base rail and against the handrail. Have a helper support the panel while you align it. Apply structural silicone sealant to the base of the panel and along the connection points. Insert the panel fully into the base rail and secure any top mounting brackets to the handrail. Allow the silicone to cure for 24 hours before applying pressure to the panel.
Step 4: Connect Subsequent Panels
For multi-panel installations, use glass-to-glass connectors (U-channels) to join adjacent panels. These channels slide over the edges of two panels, creating a seamless connection. Apply silicone sealant before inserting panels into the connector. Ensure each connection is square and level before the silicone sets. Stagger your work so that each section cures before moving to the next.
Step 5: Seal and Finish
Once all panels are installed and silicone has cured, apply a final bead of clear silicone along the top and bottom edges for weatherproofing and vibration damping. Clean any silicone residue from the glass using a plastic scraper and glass cleaner. Check that all fasteners are tight and that the system is stable by gently applying lateral pressure to the glass.
Maintenance and Long-Term Care
Frameless glass balusters are remarkably low-maintenance compared to traditional wooden balusters. Regular cleaning with glass cleaner and a soft cloth keeps them transparent and streak-free. Inspect the silicone seals annually for cracks or separation, and reapply sealant as needed—typically every 3-5 years depending on climate and humidity levels.
Check all fasteners periodically to ensure they remain tight. In humid climates like coastal areas of India, stainless steel hardware is essential to prevent rust and corrosion. If you notice any cracks in the glass itself, contact your installer immediately, as the panel will need replacement to maintain safety compliance.
For design consultations on integrating glass balusters with your existing interior, consider reaching out to professionals like HouseDesignWala or MS DECOR FILM, who can visualize the final result before installation.
Cost Considerations and Budget Planning
The cost of retrofitting a wooden staircase with frameless glass balusters typically ranges from ₹50,000 to ₹2,00,000 depending on staircase length, glass thickness, and whether you hire professional installers. A single flight of stairs (12-15 steps) with standard 10mm glass usually costs between ₹60,000 and ₹1,00,000 installed. Custom curves, larger panels, or premium finishes increase the price accordingly.
Obtain quotes from multiple suppliers and installers. The price should include materials, labor, silicone sealant, and a warranty covering installation defects and glass breakage. Factor in any additional costs for staircase repairs or surface preparation that may be necessary before installation begins.
Common Installation Mistakes to Avoid
Many homeowners and inexperienced installers make preventable errors that compromise safety and aesthetics. The most common mistake is insufficient silicone application, which leads to water infiltration and structural weakness. Always use structural-grade, clear silicone—not caulk—and apply it generously to all connection points.
Another frequent error is improper leveling. Each panel must be perfectly plumb and each base rail section perfectly level. Skipping this step results in uneven gaps between panels and an unprofessional appearance. Use a laser level, not a bubble level, for accuracy across longer distances.
Avoid over-tightening fasteners, which can crack tempered glass or strip threads in aluminum components. Hand-tighten bolts first, then use a wrench to snug them firmly without excessive force. Finally, don't rush the curing process—always allow silicone to fully cure (24 hours minimum) before applying any load to the installation.
Frequently Asked Questions
Is it safe to retrofit glass balusters on an old wooden staircase?
Yes, frameless glass balusters are completely safe when installed correctly on existing wooden staircases. Tempered glass is engineered to withstand significant lateral forces and meets all Indian building codes regarding safety and visibility. The installation doesn't compromise the structural integrity of the wooden staircase itself, as the glass panels are simply mounted to the existing treads and handrail using standard hardware.
How long does a frameless glass baluster retrofit typically take?
A single flight of stairs usually takes 2-4 days to complete, including material delivery, surface preparation, installation, and silicone curing time. The actual installation work spans 1-2 days, but the 24-hour silicone curing period means the staircase isn't fully usable until the third day. Larger staircases or those with curves may require additional time.
Can I install frameless glass balusters myself, or should I hire a professional?
While DIY installation is possible for experienced homeowners with proper tools and patience, professional installation is strongly recommended. Improper installation can result in safety hazards, water damage, or aesthetic issues that are expensive to correct. Professional installers have specialized equipment, expertise in silicone application, and typically provide warranties on their work. The labor cost is usually justified by the quality and longevity of the installation.
What is the difference between 10mm and 12mm tempered glass?
The primary difference is durability and cost. 12mm glass is thicker and more rigid, making it ideal for longer spans and higher-traffic staircases. It's also more resistant to vibration and provides better sound insulation. 10mm glass is adequate for most residential staircases and costs less. Both meet building code requirements; the choice depends on your staircase dimensions and budget.
How do I maintain frameless glass balusters?
Maintenance is minimal. Clean the glass regularly with a glass cleaner and soft cloth to maintain transparency. Inspect silicone seals annually for cracks, and reapply sealant every 3-5 years. Check that all fasteners remain tight, and ensure stainless steel hardware shows no signs of corrosion. In humid climates, this maintenance becomes even more important.
Ready to transform your wooden staircase with modern frameless glass balusters? Explore trusted glass suppliers and installation professionals in your area through glassy.in, India's largest glass-business directory. Connect with experienced installers, request detailed quotes, and view completed projects to find the perfect partner for your retrofit project.