
Glass Railings
How to Install Glass Railings on Wooden Staircases: Step-by-Step Guide
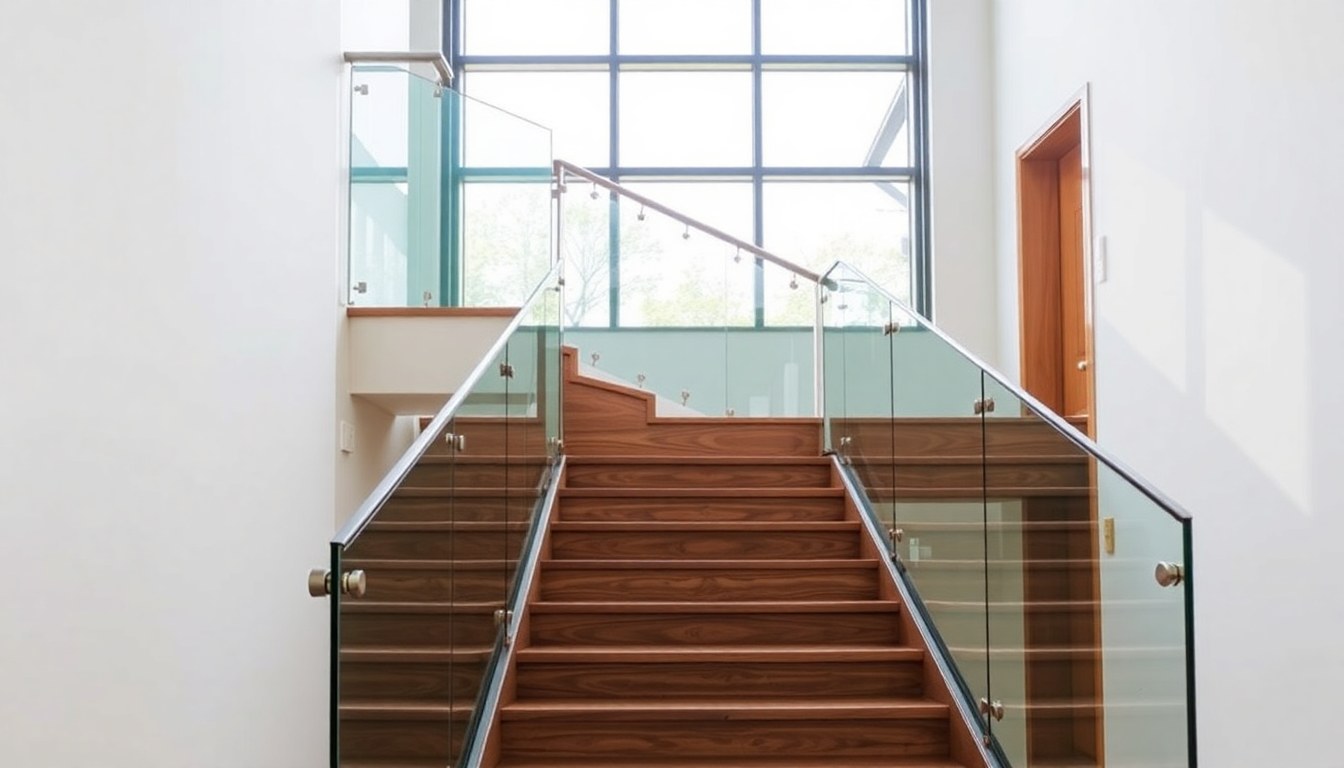
Glass railings on wooden staircases create a stunning visual effect that opens up your interior space while maintaining safety standards. Whether you're upgrading an existing staircase or building new, installing glass balustrades requires careful planning, proper tools, and attention to detail. This guide walks you through the entire process—from site assessment to final finishing—so you can achieve professional results on your timber staircase.
Understanding Glass Railing Types and Materials
Before you begin installation, you need to understand the two main types of glass railings: frameless and framed systems. Frameless glass railings consist of tempered glass panels held in place by metal channels or standoffs, creating an unobstructed view. Framed systems use aluminum or stainless steel frames around the glass, offering additional structural support and a more traditional appearance. The choice depends on your aesthetic preference, budget, and the structural characteristics of your wooden staircase.
For wooden staircases, tempered glass is essential—it's four to five times stronger than regular glass and shatters into small, harmless granules if broken. Most installations use 10-12mm tempered glass panels, which provide the right balance between durability and weight. Indian building codes, including the National Building Code (NBC), require that glass railings on stairs meet specific safety standards, including height requirements of at least 1100mm and load resistance of 1.2 kN/m.
Frameless vs. Framed Systems
- Frameless systems: Minimal visual obstruction, modern aesthetic, requires more precise installation, typically costs ₹8,000-₹15,000 per running meter
- Framed systems: Greater structural support, easier to install, more design flexibility, typically costs ₹5,000-₹10,000 per running meter
Tools and Materials You'll Need
Proper preparation ensures a smooth installation process. Gather all necessary tools and materials before starting work to avoid delays and safety risks. For most installations, you'll need a power drill with masonry and wood bits, a level (preferably a 2-meter spirit level), a tape measure, a stud finder, and a circular saw if you need to cut glass or trim wood.
Material requirements include tempered glass panels (custom-cut to your specifications), stainless steel or aluminum channels or standoffs, corrosion-resistant fasteners (stainless steel bolts, washers, and nuts), silicone sealant rated for both glass and wood, sandpaper in various grits, and wood filler if you're repairing the staircase before installation. For wooden staircases, always use stainless steel hardware to prevent rust and wood degradation.
Essential Tools Checklist
- Power drill with variable speed control
- 10mm and 12mm drill bits (for fasteners)
- 2-meter spirit level
- Tape measure and marking pencil
- Stud finder (to locate solid wood)
- Wrench set for fastener installation
- Caulking gun for silicone application
- Safety glasses and work gloves
Preparing Your Wooden Staircase
The foundation of any successful glass railing installation is proper staircase preparation. Begin by inspecting your wooden stairs for damage, rot, or structural weakness. Pay special attention to the areas where you'll be drilling and anchoring the railing system. If you find soft or damaged wood, replace or repair those sections before proceeding—installing railings on compromised wood creates safety hazards and reduces the longevity of your installation.
Clean the staircase thoroughly and sand the surface where the railing will be mounted. This removes dust, old finishes, and debris that could prevent proper adhesion of sealants and create gaps between the glass and the wood. Use 120-grit sandpaper for initial smoothing, then finish with 220-grit sandpaper for a smooth surface. If your stairs have a varnish or polyurethane coating, lightly sand these areas to improve adhesion of the silicone sealant.
Structural Assessment
Use a stud finder to identify the solid wood structure beneath any surface finishes. Mark these locations with a pencil—these are your ideal drilling points. For wooden staircases, the stringers (the diagonal support beams) are the strongest points for anchoring. Avoid drilling into the treads (horizontal steps) unless they're reinforced with steel plates underneath. Take measurements and create a detailed drilling plan before touching the drill.
Installation Process for Frameless Glass Railings
Frameless systems require more precision but deliver superior aesthetics. Start by marking all drilling points using your measurements and level. Use a 10mm drill bit for the pilot holes, drilling slowly to prevent splintering. Once pilot holes are complete, enlarge them to the appropriate size for your fasteners (typically 12mm for stainless steel anchors).
Insert stainless steel threaded inserts or concrete anchors into each hole. For wooden staircases, use expanding anchors or lag bolts with washers—these distribute the load across a wider area and prevent the fastener from pulling through the wood. Install the glass panels into the bottom channel first, then secure the top channel with your fasteners. Check level constantly as you work, making micro-adjustments before fully tightening fasteners.
Securing the Glass Panels
Once channels are in place, carefully insert the tempered glass panels. Frameless systems typically use rubber or silicone gaskets within the channels to hold the glass securely while allowing for thermal expansion and contraction. Ensure the gaskets are properly seated before inserting the glass. For a professional finish, apply silicone sealant around the perimeter where the glass meets the wood—this prevents water infiltration and provides additional structural support.
Allow silicone sealant to cure for 24-48 hours before applying any stress to the railing. During this curing period, do not allow anyone to use the stairs. Many professional installers in India, including specialists at Studio IN-GRID, recommend this waiting period to ensure maximum adhesion and safety.
Installation Process for Framed Glass Railings
Framed systems offer more flexibility and are generally easier for DIY installation. The aluminum or stainless steel frame provides the primary structural support, with the glass panels filling the space within. Begin by assembling your frame sections according to the manufacturer's specifications. Most frames come with pre-drilled holes, simplifying the installation process.
Position the frame assembly on your staircase and use a level to ensure it's perfectly vertical and horizontal. Mark all mounting points, then drill pilot holes into the wooden staircase. Install stainless steel fasteners through the frame into the wood, tightening them gradually and checking level after each fastener. Once the frame is secure, slide or insert the glass panels into the frame grooves or channels.
Finishing Framed Installations
After the glass is installed, seal any gaps between the frame and the wood with silicone sealant. For framed systems, this is more forgiving than frameless installations because the frame provides structural integrity. Apply sealant smoothly using a caulking gun, smoothing it with a wet finger or caulking tool for a professional appearance. Framed systems often require finishing caps or trim pieces at the top and bottom—install these according to your frame manufacturer's instructions.
Safety Checks and Finishing Touches
After installation is complete and sealant has cured, perform thorough safety checks before allowing anyone to use the railing. Apply firm downward and outward pressure to the glass panels—they should not flex excessively or move. Check all fasteners with a wrench to ensure they remain tight. If you notice any movement, immediately re-tighten the fasteners and add additional sealant if needed.
For the finishing touches, clean the glass thoroughly with a glass cleaner and lint-free cloth. Apply any protective coatings to the wood around the installation to match your existing staircase finish. If you've used bare stainless steel hardware, you might consider applying a clear lacquer to prevent fingerprints and maintain the aesthetic appearance. Finally, inspect the installation one more time to ensure it meets the safety standards outlined in the National Building Code.
Maintenance Recommendations
- Clean glass monthly with a pH-neutral glass cleaner
- Inspect fasteners quarterly and tighten if necessary
- Check sealant annually for cracks or deterioration
- Reapply wood finish every 2-3 years to prevent moisture damage
- Avoid using abrasive cleaners that can scratch the glass
Common Mistakes to Avoid
Many homeowners and inexperienced installers make preventable errors that compromise safety and aesthetics. The most common mistake is drilling in the wrong location—always use a stud finder and mark multiple reference points before drilling. Another frequent error is using non-stainless steel fasteners, which rust and corrode in wooden staircases, eventually failing and creating safety hazards.
Inadequate sealant application is another critical mistake. Silicone sealant does more than create a finished appearance—it prevents water from seeping into the wood, which causes rot and structural failure. Apply sealant generously and allow full curing time. Finally, many installers skip the safety checks, assuming the installation is complete once the glass is in place. Always test the railing's stability before considering the job finished.
Frequently Asked Questions
How long does it take to install glass railings on a wooden staircase?
A typical single-flight staircase installation takes 4-8 hours for experienced installers, depending on whether you're using a frameless or framed system. Frameless systems require more precision and typically take longer. For DIY installations without prior experience, plan for 2-3 days of work, including preparation, installation, and sealant curing time. The actual installation might take 8-12 hours spread across multiple days to allow for proper sealant curing between steps.
What is the cost of installing glass railings on wooden stairs in India?
Costs vary significantly based on staircase length, glass type, and frame material. Framed glass railings typically cost ₹5,000-₹10,000 per running meter, while frameless systems range from ₹8,000-₹15,000 per running meter. A typical single-flight staircase (3-4 meters) would cost ₹20,000-₹60,000 for materials and professional installation. Labor costs add another 30-50% to material costs. Custom designs and premium materials can increase prices significantly.
Do glass railings require building permits in India?
Yes, modifications to staircases and railings typically require approval from your local municipal corporation or building authority. Glass railings must comply with the National Building Code requirements, including height (minimum 1100mm) and safety standards. Before beginning installation, check with your local building department or hire a professional installer who understands local regulations. Non-compliance can result in fines and mandatory removal of the installation.
Can I install glass railings on old wooden staircases?
Yes, but the staircase must be structurally sound. Inspect the wood carefully for rot, termite damage, or structural weakness. If the staircase is solid and the stringers are intact, glass railings can be successfully installed. However, if the wood is damaged or compromised, you'll need to repair or reinforce it first. Older staircases may have different wood types and finishes that require special preparation, but installation is generally feasible with proper assessment.
How do I maintain glass railings on wooden stairs?
Regular maintenance ensures longevity and safety. Clean the glass monthly with a pH-neutral glass cleaner and soft cloth. Inspect all fasteners quarterly and tighten them if needed. Check the silicone sealant annually for cracks or deterioration, and reseal if necessary. Maintain the wood finish around the installation with appropriate stains or varnishes to prevent moisture damage. Avoid abrasive cleaners and harsh chemicals that can damage the glass or sealant.
Conclusion
Installing glass railings on wooden staircases is an achievable project that transforms your home's appearance while maintaining safety standards. Whether you choose a frameless or framed system, the key to success is careful planning, proper preparation, and attention to detail during installation. By following this step-by-step guide and adhering to safety standards, you'll create a beautiful, functional staircase railing that enhances your home for years to come.
Ready to upgrade your staircase? Browse glassy.in's comprehensive directory of glass suppliers, fabricators, and installation specialists across India. Find local experts who can assess your specific staircase and provide professional installation services tailored to your needs and budget.