
Glass Railings
Glass Railing Installation: Step-by-Step Guide for Staircases & Balconies
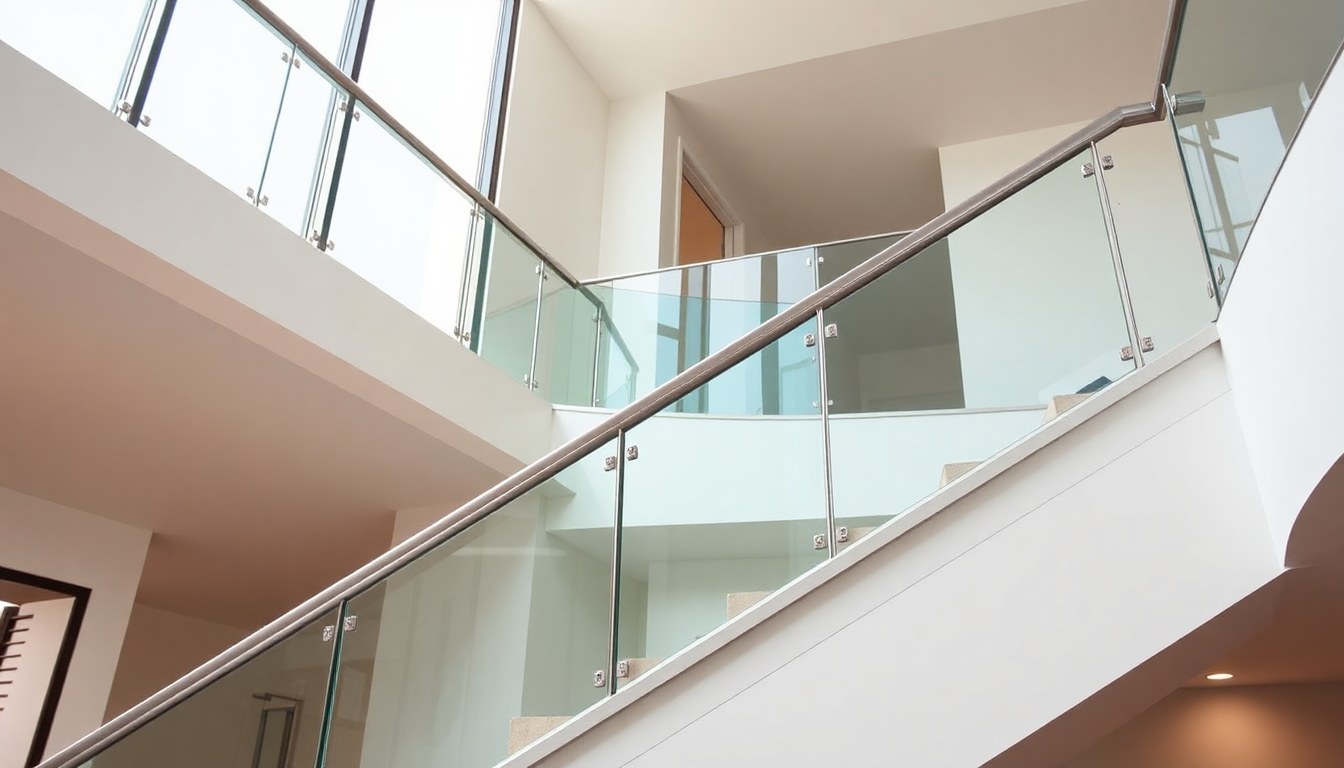
Glass railings transform staircases and balconies into stunning architectural features while maintaining unobstructed views and modern aesthetics. Whether you're upgrading a residential property or managing a commercial renovation, understanding the installation process ensures safety, compliance, and longevity. This guide walks you through every stage of glass railing installation, from planning and material selection to final finishing touches.
Understanding Glass Railing Systems and Components
Modern glass railing systems consist of several key components working together to create a safe, durable barrier. The primary elements include the glass panels (typically 10-12mm tempered glass for safety), mounting hardware (brackets, clamps, and fasteners), and support structures (posts, channels, or frameless systems). Each component plays a critical role in the overall structural integrity and aesthetic appeal of your installation.
There are three main types of glass railing systems available in India: framed systems with aluminum or stainless steel channels, frameless systems using specialized clamps, and semi-frameless designs combining both approaches. Framed systems offer maximum durability and are ideal for high-traffic areas, while frameless systems provide a sleek, minimalist look perfect for modern interiors. Understanding these options helps you select the right system for your specific application and budget.
Safety Standards and Compliance
All glass railings installed in India must comply with the National Building Code (NBC) and Indian Standards (IS 1893 for seismic design, IS 4414 for safety glass). Glass panels must be tempered or laminated to prevent shattering and must withstand a minimum horizontal load of 1.2 kN/m² (approximately 120 kg per linear meter). The glass should be at least 10mm thick for residential applications and 12mm for commercial installations.
Railing height is standardized at 1100mm minimum for residential properties and 1200mm for commercial buildings, measured from the finished floor level. Balustrades must not allow passage of a 100mm diameter sphere, preventing child entrapment. Before beginning installation, verify these requirements with your local building authority or consult with structural engineers to ensure full compliance.
Pre-Installation Planning and Material Selection
Successful glass railing installation begins long before any tools come out. Start by measuring your staircase or balcony precisely, noting the length, height variations, and any angles or curves. Document the existing structure's condition, including the mounting surface material (concrete, steel, or wood) and any obstacles like pipes or electrical conduits. These measurements determine the quantity and size of materials needed and help identify potential installation challenges.
Select materials based on your climate and maintenance preferences. In coastal areas prone to salt spray, stainless steel hardware (grade 316) is essential to prevent corrosion. For inland regions, aluminum frames with powder coating offer excellent durability at lower cost. Always source tempered glass from certified manufacturers who provide proper documentation and safety certifications. Budget approximately ₹800-1500 per square foot for complete glass railing systems, though frameless designs may cost 20-30% more.
Tools and Equipment Required
Proper tools ensure precision and safety throughout the installation process. Essential tools include a drill with masonry bits, a level (preferably laser level for accuracy), a measuring tape, a stud finder, safety glasses, and work gloves. For frameless systems, you'll need a specialized glass cutter and polishing equipment. Renting professional-grade equipment like scaffolding or hydraulic lifts is advisable for large projects or multi-story installations.
Step-by-Step Installation Process
Step 1: Surface Preparation and Marking
Begin by thoroughly cleaning the mounting surface with a degreaser to remove dust, dirt, and any loose material. Use a level to verify that your mounting surface is plumb (vertical) and mark the exact positions where posts or brackets will be installed. Mark points every 1200-1500mm along the length of the railing line, as this is the standard spacing for most systems. Use a chalk line to create a straight reference line, which is especially important for longer installations.
Step 2: Installing Posts and Support Structures
For framed systems, install vertical posts first using heavy-duty anchors appropriate to your base material. In concrete, use chemical anchors or expansion bolts; in steel, use welded connections; in wood, use lag bolts with washers. Ensure posts are perfectly plumb using a level, as any deviation will compound along the length of the railing and affect the final appearance. Space posts according to manufacturer specifications, typically 1200-1500mm apart for optimal structural performance.
Tighten all fasteners securely but avoid over-tightening, which can crack the mounting surface or strip threads. For frameless systems, install the bottom channel first, ensuring it's perfectly level before securing. This channel carries most of the load and must be installed with precision.
Step 3: Installing Glass Panels
Carefully lift glass panels into position, using proper lifting equipment and at least two people for panels larger than 1.2m². For framed systems, slide panels into the top and bottom channels, ensuring they're seated properly before tightening clamps. Tighten clamps in a cross pattern (top-left, bottom-right, top-right, bottom-left) to ensure even pressure and prevent glass stress.
For frameless systems, use specialized glass clamps that grip the edges without damaging the tempered surface. These clamps typically feature rubber or silicone inserts to distribute pressure evenly. Install clamps at 300-400mm intervals along the top and bottom edges of each panel. Leave small gaps (3-5mm) between panels to allow for thermal expansion and contraction, which prevents stress fractures in the glass.
Step 4: Sealing and Weatherproofing
Apply high-quality silicone sealant to all joints between glass panels, between glass and metal frames, and at the base where the railing meets the mounting surface. Use a caulking gun to apply a continuous, smooth bead of sealant, then smooth it with a wet finger or caulk tool. This prevents water infiltration and improves the overall structural integrity of the system.
For outdoor installations, consider using polyurethane sealants or specialized structural glazing sealants, which offer superior weather resistance compared to standard silicone. Allow all sealants to cure fully (typically 24-48 hours) before exposing the railing to heavy loads or weather conditions.
Step 5: Final Adjustments and Testing
Once installation is complete, verify that all components are secure and the railing meets safety standards. Apply horizontal pressure at mid-height along the railing to ensure it doesn't flex excessively—movement should be minimal, typically less than 5mm under hand pressure. Check that glass panels are free from stress marks or cracks, and verify that all fasteners are tight.
Perform a visual inspection for proper alignment, ensuring the top of the railing is level and parallel to the stairs or floor. Clean all glass surfaces with appropriate glass cleaner and inspect for any installation defects before considering the project complete.
DIY Installation vs. Professional Installation
DIY glass railing installation is feasible for straightforward, single-story projects with experienced homeowners who have proper tools and safety equipment. However, most projects benefit significantly from professional installation. Professionals bring expertise in handling structural complexities, ensuring code compliance, and managing safety risks that can result in serious injuries if mishandled.
Professional installers from established firms like Studio IN-GRID complete projects faster, typically finishing a standard staircase railing in 1-2 days compared to 3-5 days for DIY projects. They also provide warranties on their work and handle any issues that arise post-installation. For complex designs, multi-story installations, or frameless systems, professional installation is strongly recommended despite the higher initial cost.
If you choose the DIY route, invest in proper safety equipment including fall protection harnesses for elevated work, and never rush the installation process. Take time to understand the specific manufacturer's instructions for your chosen system, as installation methods vary between brands and system types.
Common Installation Mistakes to Avoid
One of the most frequent mistakes is improper measurement, leading to panels that don't fit correctly or require awkward cutting. Always measure twice and account for thermal expansion gaps when calculating final dimensions. Another common error is inadequate fastening—using incorrect anchor types for the mounting surface or failing to use washers, which can lead to loose railings and safety hazards.
Improper sealing is another critical mistake that compromises the longevity of the installation. Many DIY installers skip sealing or use low-quality sealants, allowing water infiltration that causes rust, structural decay, and glass deterioration. Additionally, failing to verify plumb and level at each stage compounds errors and results in visually unpleasing installations that may not meet safety standards.
Over-tightening fasteners is surprisingly common and can crack glass panels or damage mounting surfaces. Use a torque wrench to apply the correct pressure specified by the manufacturer. Finally, rushing the curing process of sealants or adhesives before the railing bears load can compromise structural integrity. Always allow full cure time before putting the railing into service.
Maintenance and Long-Term Care
Regular maintenance extends the life of your glass railing system significantly. Clean glass panels monthly with mild soap and water, using a soft cloth to avoid scratching. Avoid abrasive cleaners that can damage the glass surface or frame finishes. Inspect fasteners quarterly and tighten any that have loosened due to vibration or thermal cycling.
Check sealants annually for cracks or deterioration, particularly around the base and joints. Replace damaged sealant promptly to prevent water infiltration. For stainless steel components, occasional wiping with a damp cloth prevents salt accumulation in coastal areas. For aluminum frames, inspect for white oxidation and clean with appropriate aluminum cleaners as needed.
If glass panels develop stress cracks or chips, replace them immediately rather than attempting repairs, as damaged glass compromises safety. Most manufacturers offer replacement panels at reasonable costs, and professional installers can replace panels quickly without disturbing the entire system.
Frequently Asked Questions
How long does glass railing installation typically take?
A standard staircase or balcony railing installation typically takes 1-2 days for professional installers, depending on the system type and project complexity. Simple framed systems on straightforward surfaces take less time, while frameless systems or installations with multiple curves or angles may require 2-3 days. DIY projects generally take 3-5 days when done carefully and correctly.
What is the cost of glass railing installation in India?
Glass railing costs in India range from ₹800-1500 per square foot for complete installed systems, including materials and labor. Framed aluminum systems are typically ₹800-1100 per square foot, while stainless steel framed systems cost ₹1200-1500 per square foot. Frameless systems start at ₹1500 per square foot and can exceed ₹2000 per square foot for premium designs. Labor costs vary by region and installer expertise, typically ranging from ₹200-400 per square foot.
Can glass railings be installed on curved staircases?
Yes, glass railings can be installed on curved staircases, but the process is more complex and requires custom fabrication. Curved systems typically use frameless designs or specially bent frames to follow the staircase curve. Installation on curved staircases requires experienced professionals and costs 30-50% more than standard installations. Custom fabrication may take 2-3 weeks, so plan accordingly for curved projects.
Are glass railings safe for homes with young children?
Glass railings are safe for homes with young children when properly installed according to safety standards. The 100mm sphere rule (no gaps larger than 100mm) prevents child entrapment, and tempered glass won't shatter into sharp shards if broken. However, ensure all fasteners are secure and there are no sharp edges. Supervise young children around glass railings as with any elevated surface, and consider additional safety measures if your child has a tendency to climb.
How do I clean and maintain glass railings?
Clean glass panels monthly using mild soap, water, and a soft cloth or squeegee. Avoid abrasive cleaners, steel wool, or rough cloths that scratch the glass. For stubborn stains, use specialized glass cleaners formulated for tempered glass. Inspect fasteners and sealants quarterly, tightening loose fasteners and replacing damaged sealant promptly. In coastal areas, wipe down stainless steel components monthly to prevent salt corrosion. Annual professional inspection helps catch issues before they become serious problems.
Conclusion
Glass railing installation transforms your space while providing essential safety and structural benefits. Whether you choose DIY installation for simple projects or hire professionals for complex designs, understanding the process ensures a successful outcome that meets safety standards and lasts for decades. Proper planning, quality materials, precise execution, and regular maintenance are the keys to beautiful, durable glass railings that enhance your property's value and aesthetic appeal.
Ready to find experienced glass railing installers in your area? Browse India's most comprehensive glass business directory at glassy.in to connect with certified professionals who can handle your staircase and balcony projects. Whether you need consultation, custom design, or complete installation services, our directory features verified glass businesses ready to bring your vision to life.