
Glass Railings
How to Install Glass Railings on Staircases: Step-by-Step Guide
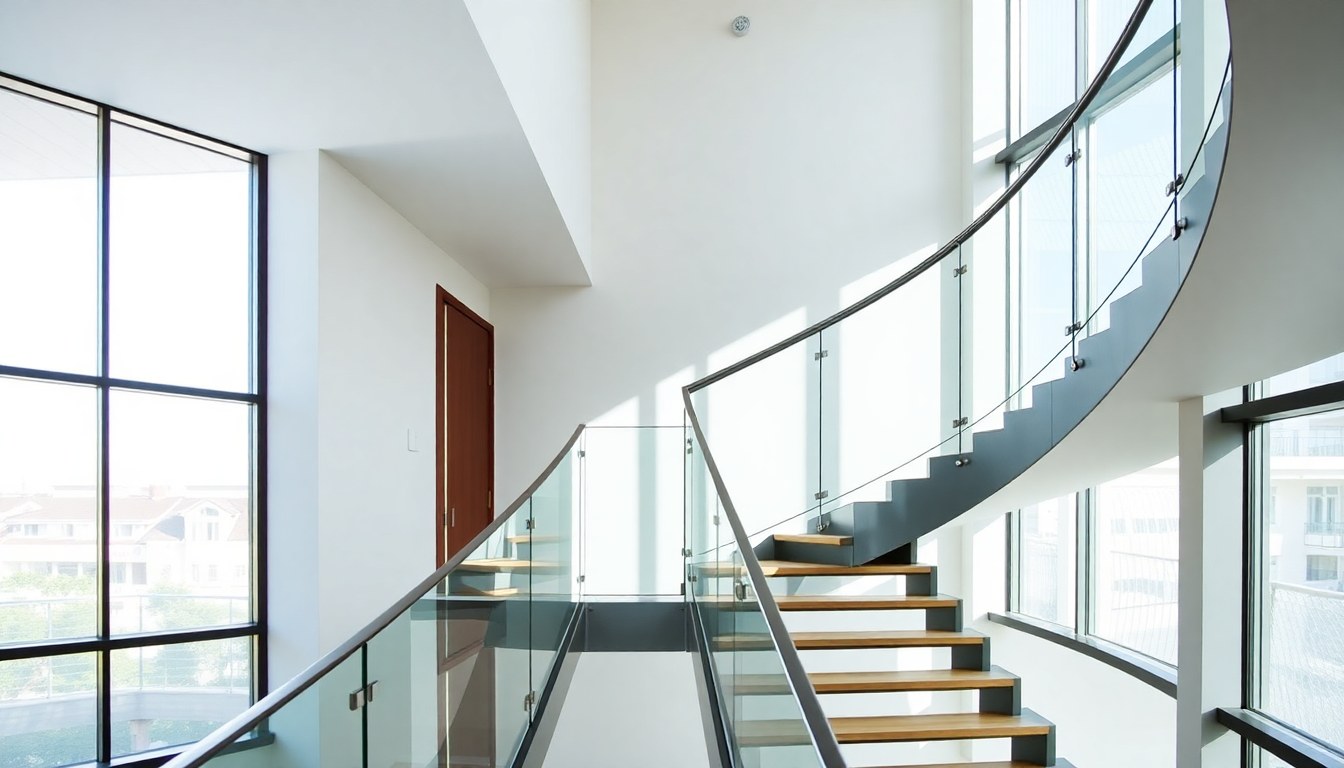
Glass railings have become the preferred choice for contemporary home and commercial designs, offering unobstructed views while maintaining safety standards. Whether you're renovating a residential staircase or installing railings in a commercial building, understanding the installation process ensures both aesthetic appeal and structural integrity. This step-by-step guide covers everything you need to know about installing frameless glass railings on staircases, from planning and material selection to final installation and safety compliance.
Understanding Glass Railing Systems and Types
Before beginning installation, it's essential to understand the different glass railing systems available in the Indian market. Frameless glass railings, also known as structural glass railings, use thick tempered glass panels held together by minimal metal components, creating a seamless appearance. Framed systems, by contrast, use aluminum or stainless steel frames to hold the glass panels, offering easier installation and maintenance.
Frameless systems typically require 12mm to 19mm tempered glass, while framed systems can work with thinner glass. The choice between frameless and framed depends on your budget, aesthetic preferences, and structural requirements. For residential staircases in India, frameless glass railings typically range from ₹800 to ₹2,500 per running foot, depending on glass thickness and hardware quality. Professional designers like Studio IN-GRID can help you select the right system for your space.
Pre-Installation Planning and Measurements
Accurate measurements form the foundation of successful glass railing installation. Begin by measuring the staircase dimensions, including the total length, height, and any curves or angles. Document the stair width, tread depth, and the exact distance from the stair edge to the wall or supporting structure. These measurements determine the glass panel sizes and the number of supporting posts required.
Check local building codes and safety standards before proceeding. In India, glass railings must comply with IS 6533 (safety code for glass in buildings) and relevant state building bylaws. The railing height should be at least 1.1 meters (42 inches) for residential staircases and 1.2 meters for commercial installations. The glass panels must also pass impact resistance tests, ensuring they won't shatter under accidental impact.
Creating a Detailed Installation Plan
Sketch the staircase layout showing all measurements, post locations, and glass panel dimensions. Mark any obstructions, electrical outlets, or architectural features that might affect installation. If your staircase has curves or unusual angles, consider consulting a professional installer to ensure proper fitting and safety compliance.
Essential Tools and Materials for Installation
Gathering the right tools and materials before starting prevents delays and ensures quality results. You'll need tempered glass panels cut to specifications, stainless steel or aluminum posts, base plates, mounting brackets, and hardware including bolts, nuts, and washers.
Complete Tools List
- Drill machine with appropriate bits for glass and metal
- Level (spirit level and laser level for accuracy)
- Measuring tape and chalk line
- Socket wrench set for bolt installation
- Silicone sealant and caulking gun
- Safety equipment: gloves, safety glasses, and dust mask
- Glass-cutting tools (if custom cuts are needed)
- Torque wrench for proper bolt tightening
Materials Checklist
- Tempered glass panels (12-19mm thickness)
- Stainless steel 304 or 316 posts and brackets
- Mounting hardware and fasteners
- Structural sealant (silicone or polyurethane)
- Rubber gaskets and shims for vibration dampening
- Stainless steel cable or clips (for cable railing systems)
Step-by-Step Installation Process
The installation process requires precision and attention to safety. Follow these steps carefully to ensure your glass railings meet safety standards and function properly for years to come.
Step 1: Prepare the Staircase
Clean the staircase thoroughly, removing dust, debris, and any old railing remnants. Inspect the stair structure for cracks, weak spots, or damage that must be repaired before installation. Ensure the stair stringers are level and properly secured. If installing over existing railings, remove them completely and patch any mounting holes in the structure.
Step 2: Mark Post Locations
Using your measurements and installation plan, mark the exact locations where posts will be mounted. Posts are typically spaced 1.2 to 1.5 meters apart, depending on the glass thickness and local building codes. Use a chalk line and level to ensure posts are perfectly vertical. Mark drilling points clearly on the stair stringers or support structure.
Step 3: Drill Mounting Holes
Drill holes for post mounting according to marked locations. For concrete or stone stairs, use a masonry drill bit and anchor bolts. For wooden stairs, use wood screws with washers. Ensure holes are drilled straight and to the correct depth—typically 50-75mm into the substrate. Clean out all dust from drilled holes before inserting fasteners.
Step 4: Install Base Posts
Insert rubber gaskets into mounting holes to prevent vibration and water seepage. Position the base plates and posts, ensuring they're perfectly vertical using a spirit level. Hand-tighten bolts first, then use a torque wrench to tighten them to manufacturer specifications (typically 60-80 Nm for stainless steel bolts). Over-tightening can crack the glass or warp the posts.
Step 5: Install Glass Panels
Carefully lift glass panels into position between posts. For frameless systems, apply structural sealant to the glass edges and post surfaces where they'll contact. Slide the glass panel into the post channels or onto mounting brackets. Ensure the panel is perfectly vertical and level before the sealant begins to set. Use rubber spacers to maintain consistent gaps between glass and metal components.
Step 6: Secure Glass Panels
For framed systems, secure glass panels using rubber gaskets and stainless steel clips. Tighten clips gradually in a cross-pattern to distribute pressure evenly. For frameless systems, apply additional sealant around the glass perimeter and allow it to cure fully before applying load. Most silicone sealants require 24-48 hours for complete curing.
Step 7: Install Top Rails (if applicable)
If your design includes a top rail, install it after all glass panels are secured. Top rails can be stainless steel, aluminum, or glass, depending on your design preference. Ensure top rails are at the correct height (minimum 1.1 meters from stair tread) and properly secured to all posts.
Safety Standards and Compliance Considerations
Glass railings must meet specific safety requirements to protect occupants. Tempered glass is mandatory because it breaks into small, relatively harmless pieces rather than sharp shards. The glass must withstand horizontal impact loads of at least 1.2 kN per square meter without breaking or dislodging from its frame.
All fasteners should be stainless steel (grade 304 or 316) to prevent corrosion and ensure longevity. Regular inspection of the railing system is recommended, especially in high-traffic areas. Check for cracks in the glass, loose bolts, or deteriorating sealant annually. In humid climates or coastal areas, more frequent inspections may be necessary to prevent corrosion.
If you're uncertain about compliance or have a complex installation, consult local building authorities or hire a certified installer. Many cities in India now require third-party certification for glass railings in commercial buildings.
Maintenance and Long-Term Care
Proper maintenance extends the lifespan of your glass railings and keeps them looking pristine. Clean glass panels regularly with a soft cloth and mild detergent solution. Avoid abrasive cleaners that can scratch the glass surface. For stainless steel components, use a microfiber cloth to prevent water spots and maintain the finish.
Inspect sealant annually for cracks, gaps, or discoloration. Replace deteriorated sealant immediately to prevent water infiltration and structural issues. Tighten bolts periodically, as vibration from foot traffic can gradually loosen fasteners. In areas with high humidity or salt exposure, apply a protective coating to stainless steel components every 2-3 years.
Frequently Asked Questions
What thickness of tempered glass is required for staircase railings?
For residential staircases, 12mm tempered glass is typically sufficient for framed systems, while frameless systems usually require 16mm or 19mm glass for structural integrity. Commercial installations often require 19mm glass due to higher safety standards and heavier use. Your choice depends on the span between posts, local building codes, and your design preferences. Always consult your local building authority to confirm minimum thickness requirements for your specific location.
How long does glass railing installation take?
A typical residential staircase with 3-4 sections can be installed in 2-3 days, including curing time for sealant. Complex installations with curves, multiple landings, or custom glass cuts may require 4-7 days. Professional installers can work faster than DIY attempts, and they typically schedule additional time for sealant curing before the railing is put into full use.
Can glass railings be installed on curved staircases?
Yes, glass railings can be installed on curved staircases, but it requires custom-cut curved glass panels and specialized mounting techniques. Curved installations are more complex and expensive than straight staircases, often costing 30-50% more. You should definitely hire a professional installer experienced with curved glass installations to ensure safety and proper fit.
How do I clean glass railings effectively?
Use a soft microfiber cloth with a mixture of equal parts white vinegar and water, or use a commercial glass cleaner. Wipe in one direction to avoid streaks. For stubborn spots, let the solution sit for a few minutes before wiping. Avoid harsh abrasive cleaners, steel wool, or high-pressure washers that can scratch or damage the glass and sealant.
What is the cost of installing glass railings in India?
Glass railing costs in India typically range from ₹800 to ₹2,500 per running foot for residential installations, depending on glass thickness, system type (framed vs. frameless), and hardware quality. Professional installation labor adds another ₹300-₹800 per running foot. A typical 15-foot staircase might cost ₹15,000-₹45,000 including materials and installation. Commercial installations are generally more expensive due to stricter safety requirements and higher-quality materials.
Conclusion and Next Steps
Installing glass railings on staircases combines modern aesthetics with safety when done correctly. Whether you choose frameless elegance or practical framed systems, following these steps ensures a professional result that meets safety standards and lasts for decades. For complex installations or if you prefer professional expertise, connect with experienced glass railing suppliers and installers through Glassy.in, India's largest glass business directory. Browse our comprehensive listing of certified glass professionals, suppliers, and designers who can help you find the perfect solution for your staircase. Visit Glassy.in today to connect with trusted glass industry experts in your area.